< Back
Saltstraumen Maelstrom Process Blog
Master’s Thesis Project
Breakdown
11/9/22 Update
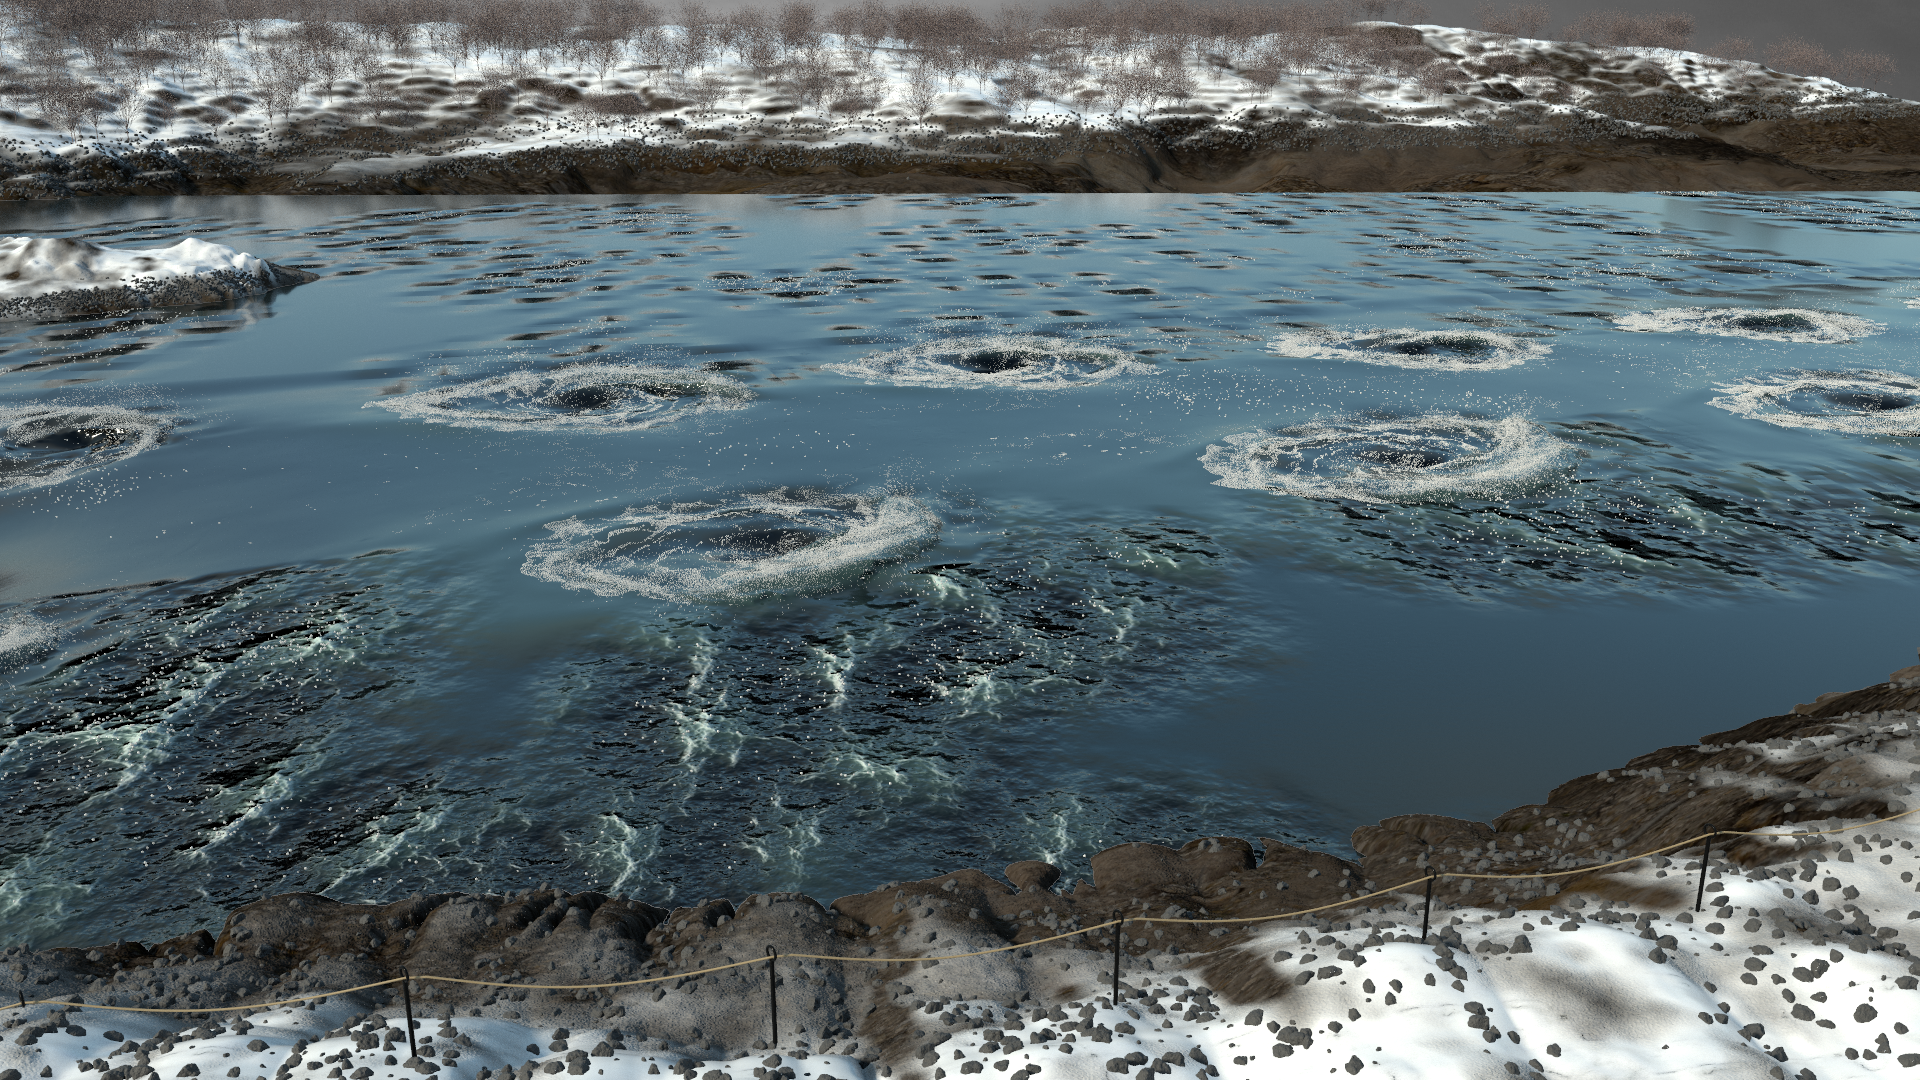
Here is a short render with the updated water. My computer restarted midway through the render, so this update is only 3 seconds since the rendering was cut short.
11/8/22 Update
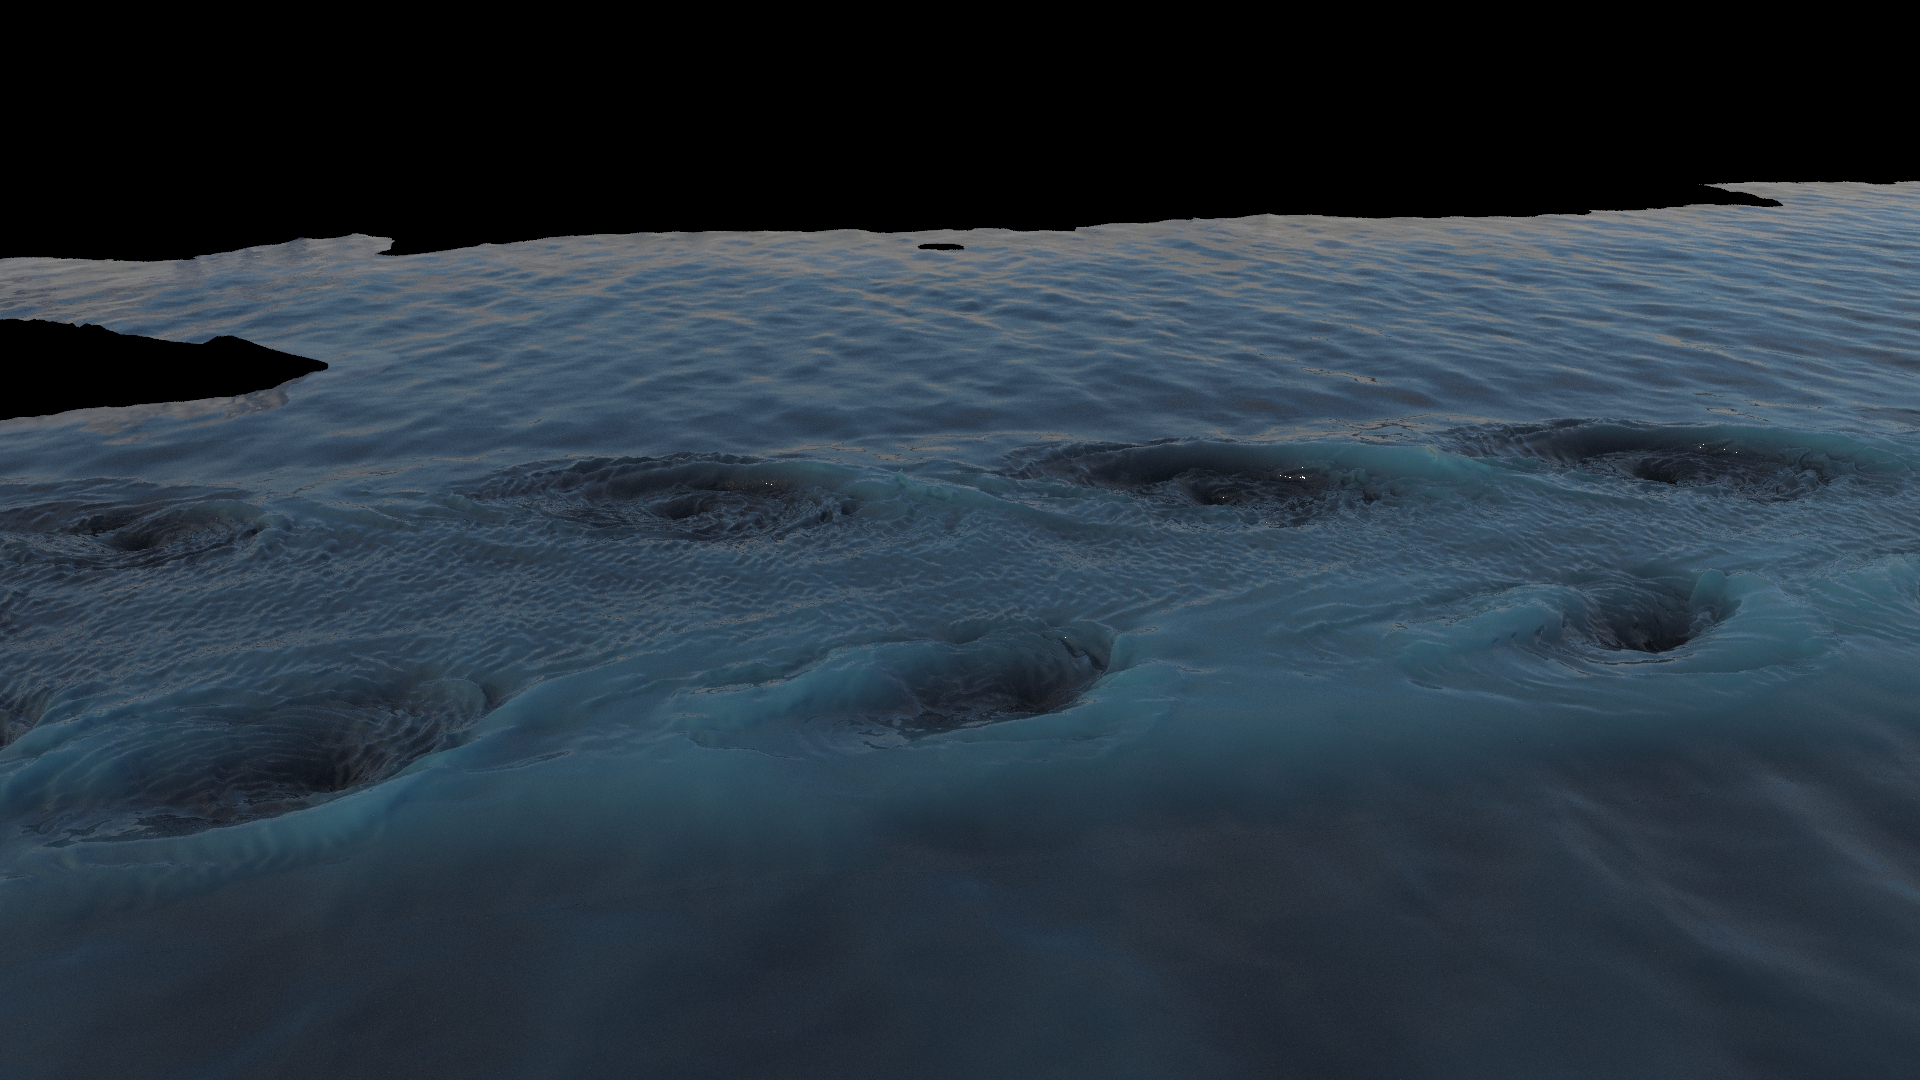
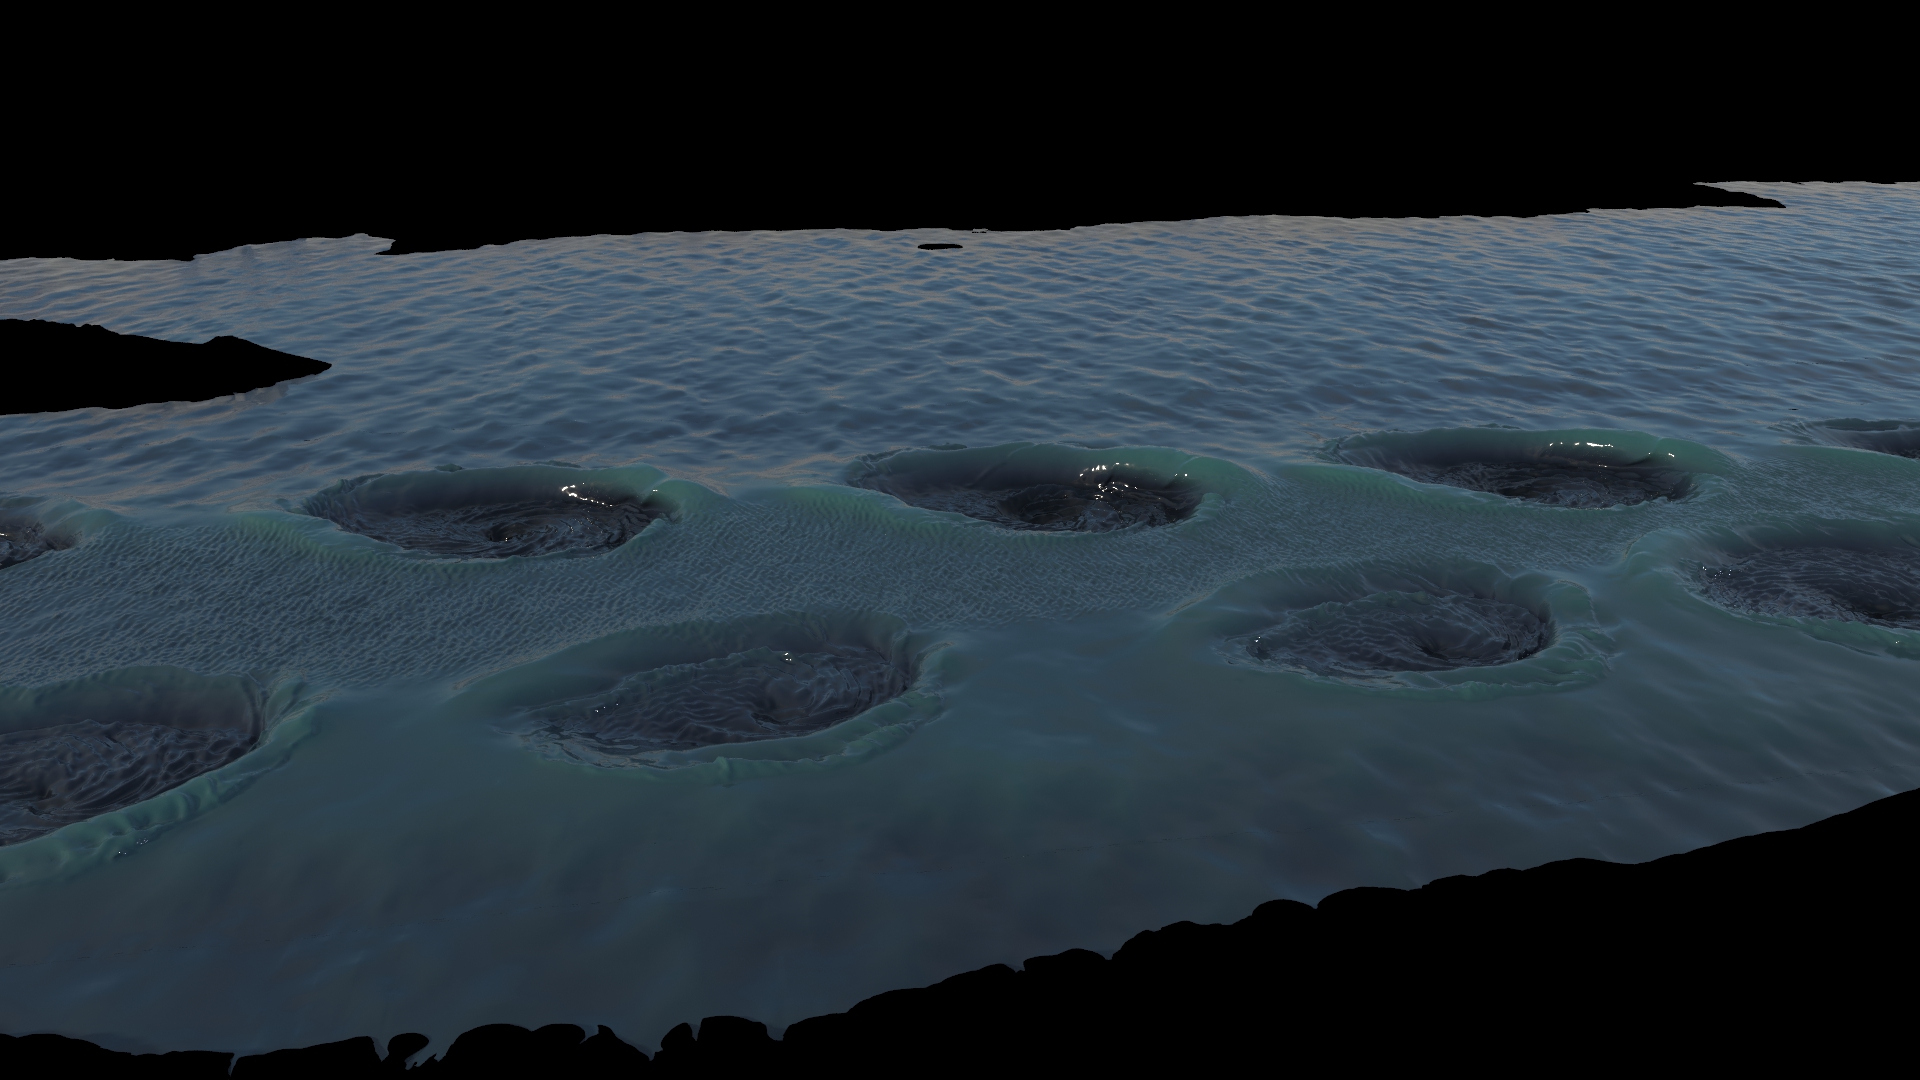
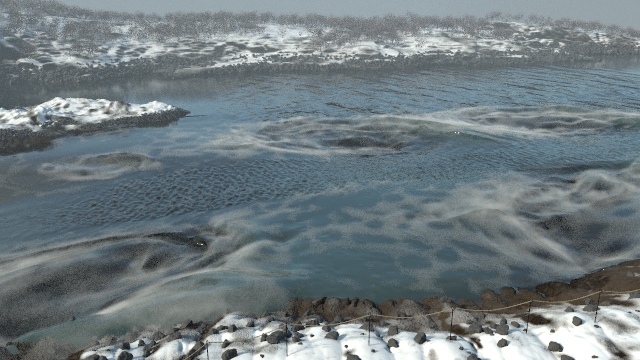
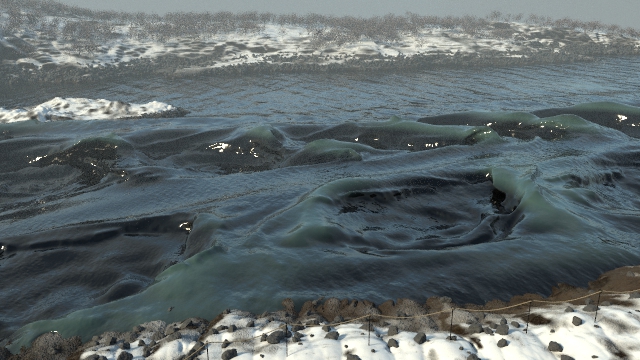
Adjustments were made to the white water. They are subtle, but feel a little more natural compared to the last version.
The look of the water is being tweaked based on feedback and correcting a few issues such as the visible line between the ocean and flip tank. This is a test render of a frame of the water. It is caching and will be rendering out tonight.
11/5/22 Update
First render with white water. The pre-roll of the water sim may need extended to avoid that burst of white water and the white water needs to be expanded. Right now it feels unrealistically limited to the whirlpools.
11/1/22 Update
Rendertimes are back into acceptable ranges. Was able to get a render test done for the simulation. Whitewater is currently being simulated and cached, I hope to have a video with those elements soon.
10/31/22 Update
I have managed to get a working Redshift setup, however there were challenges with the texturing and displacements. The mantra ocean material was allowing some of the subsurface details of the simulation to be faked, but Redshift does not have a comparable shader that I have found. In addition, geometry between the flip tank and the flatten padding creates a wall underneath the water that I have not been able to get rid of, however, the process of getting Redshift working with the spectrum may have led me to a Mantra rendering solution.
The Ocean Spectrum displacement map during render was the source of the increased rendertimes. Since Redshift was not working with the rendertime displacement, I found a solution with the ocean evaluation node to physically displace the geometry before render. At first this seemed problematic because it required me to add a lot of division to the flattened geometry, but actually provided me a way to more precisely control the geometry needed for the ocean.
I have ran a test with the Redshift and Mantra setups to see how they perform with this setup. Redshift is using a single light source, Mantra has the three light setup, however both are using the same geometry generated from the ocean evaluation node.
Redshift also appears to need the height field converted to polygons to render properly, even for creating the landmass mattes.
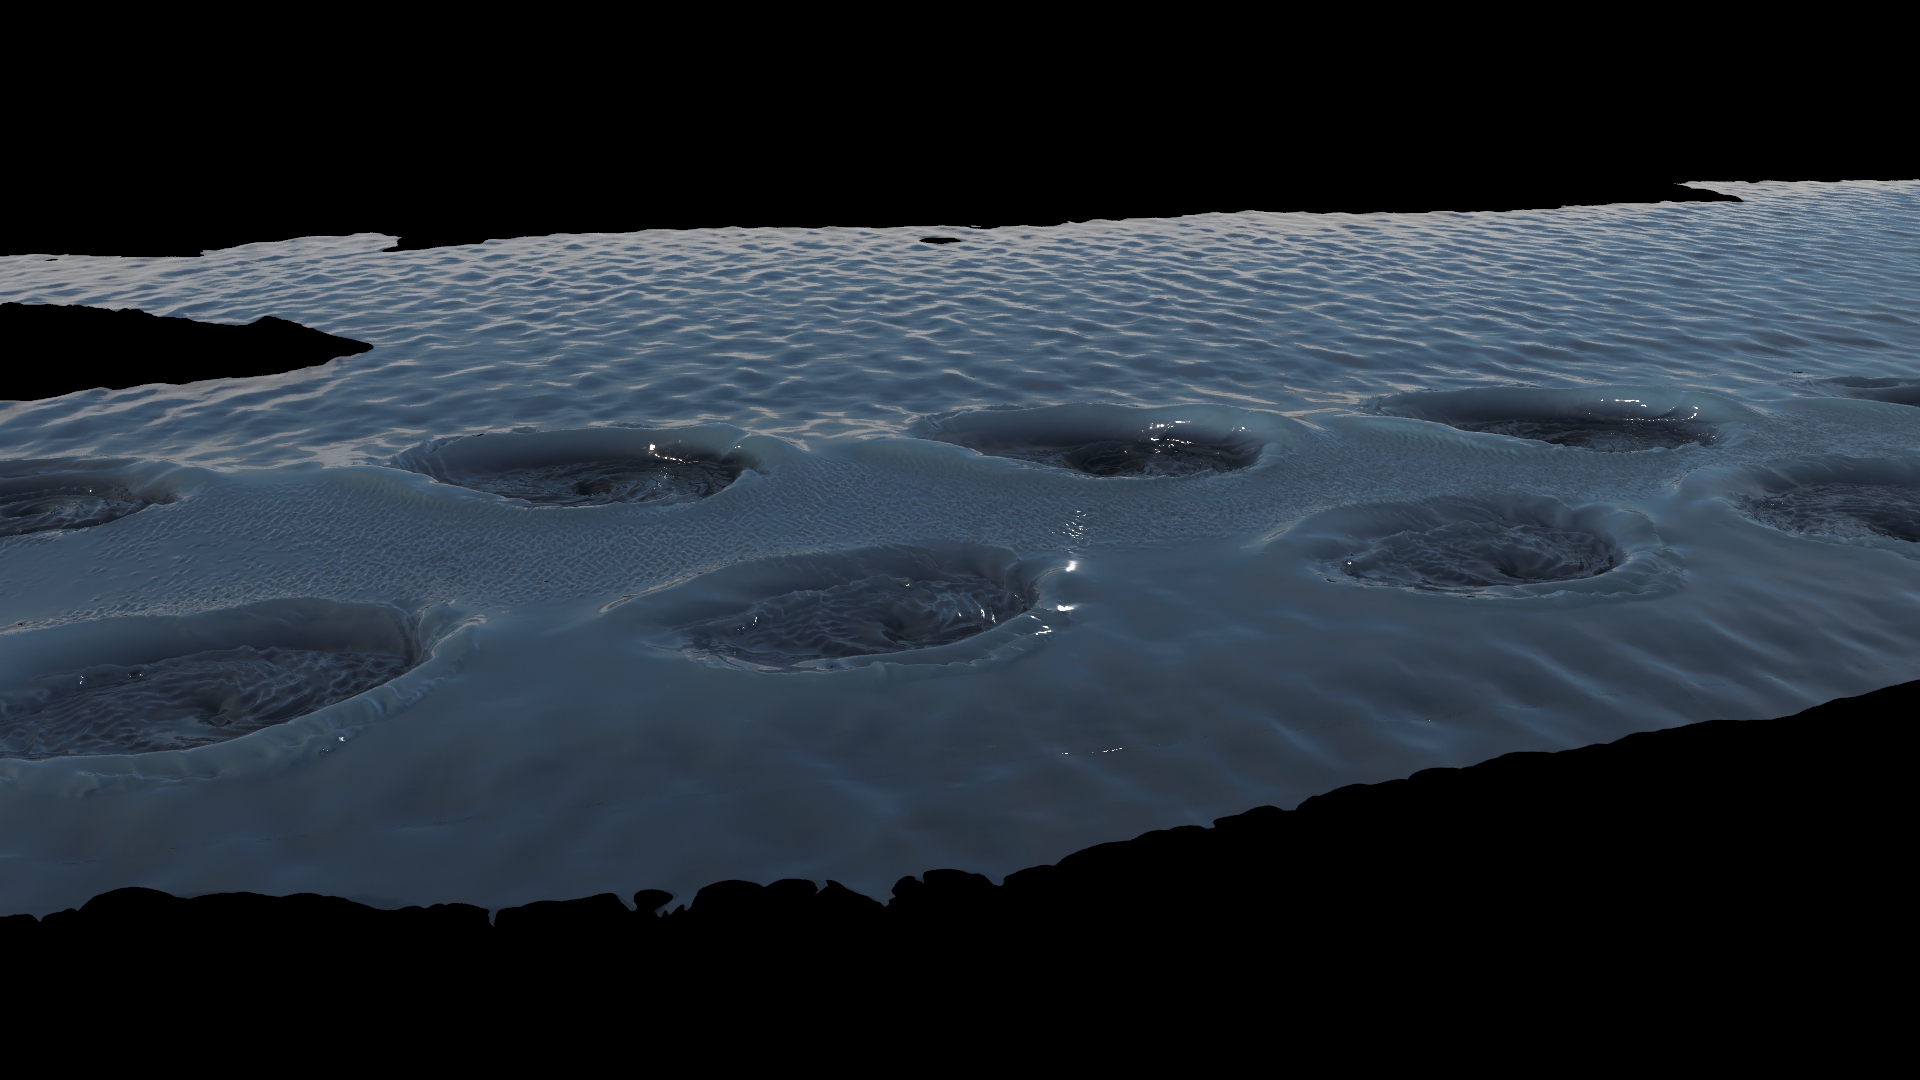
Render time: 2:31
The mantra render has lost a little of the diffuse map refinement that was applied with the render-time replacement, but overall is giving me the best looking result so far. Tonight I will refine the ocean spectra and let it cache. Once finished, tomorrow I will work through the look development of the water and then run a render overnight.
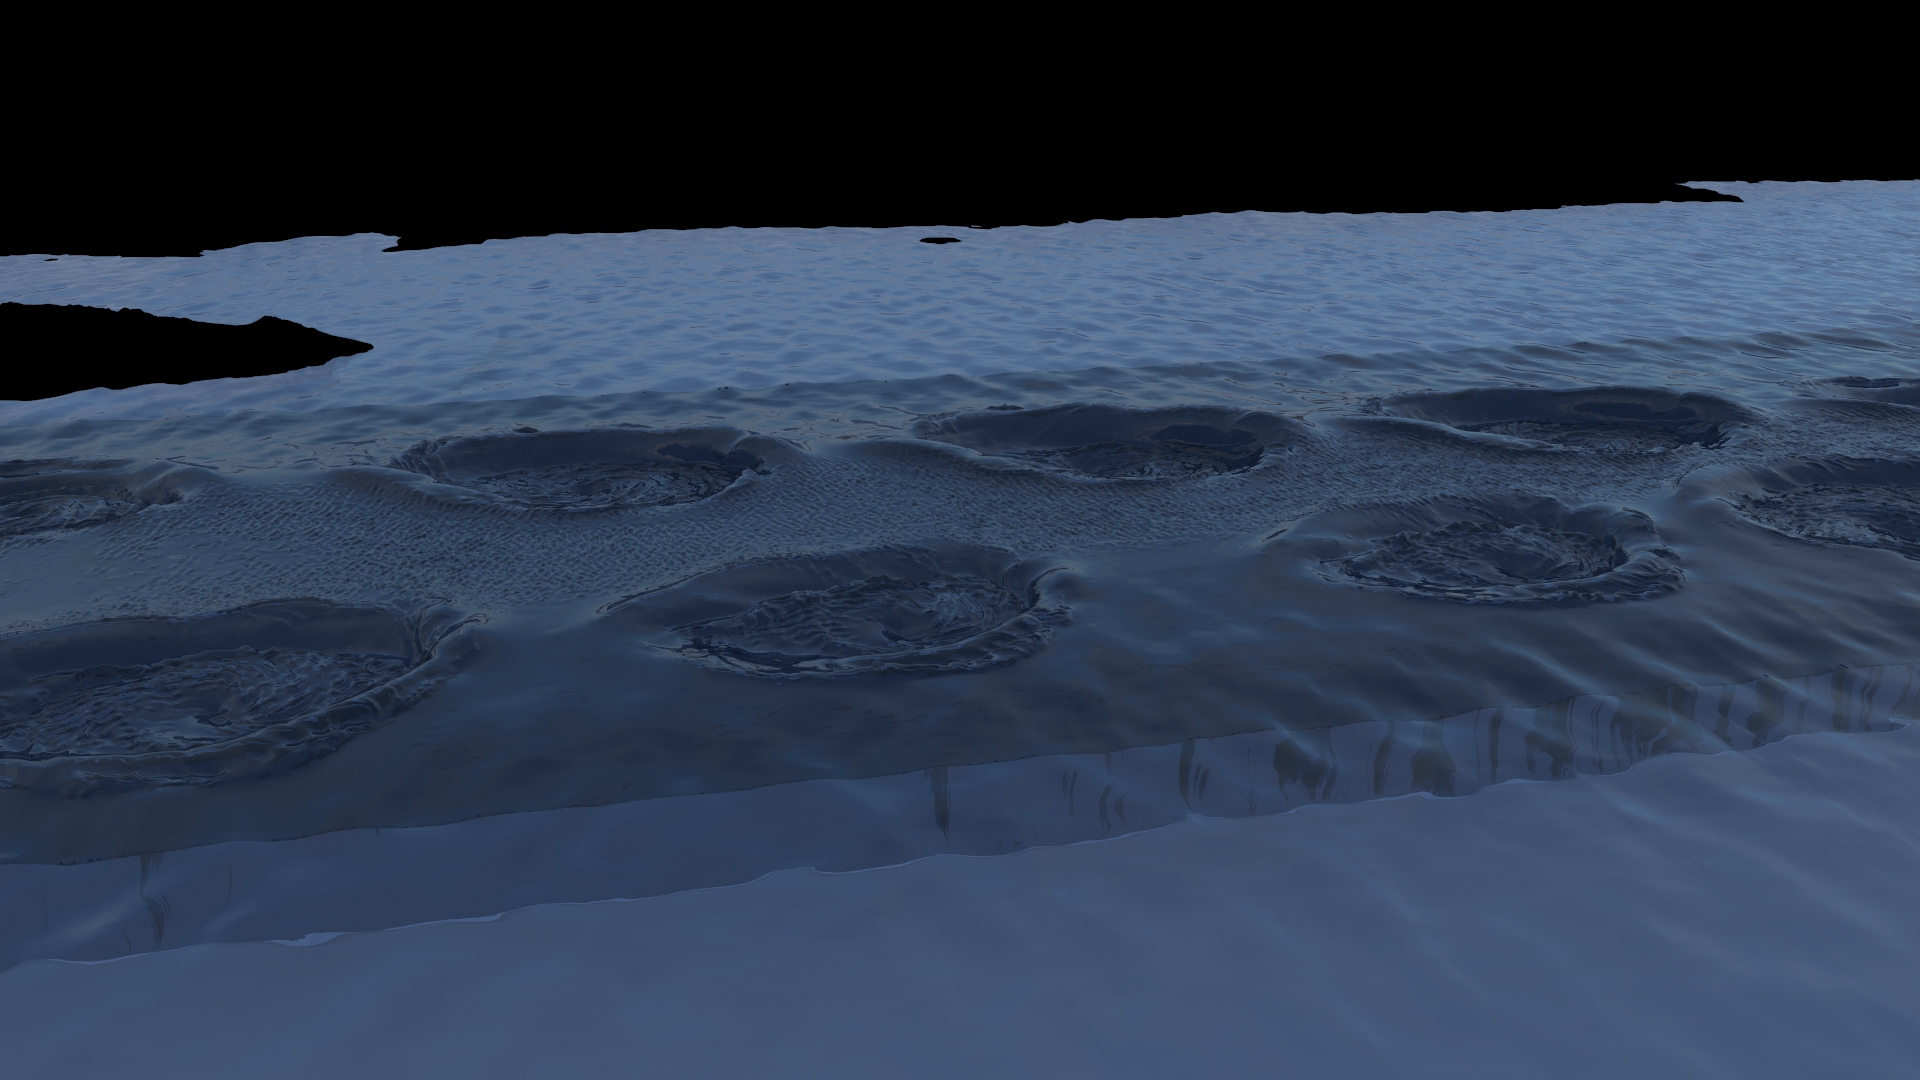
Render time: 3:50
Redshift in this setup actually took longer and the results are problematic. I believe I can approve the overall look given more time for material refinement, but the refraction/transparency settings on the materials needed to make it look like water exposes the geometry issue from the geo flattening.
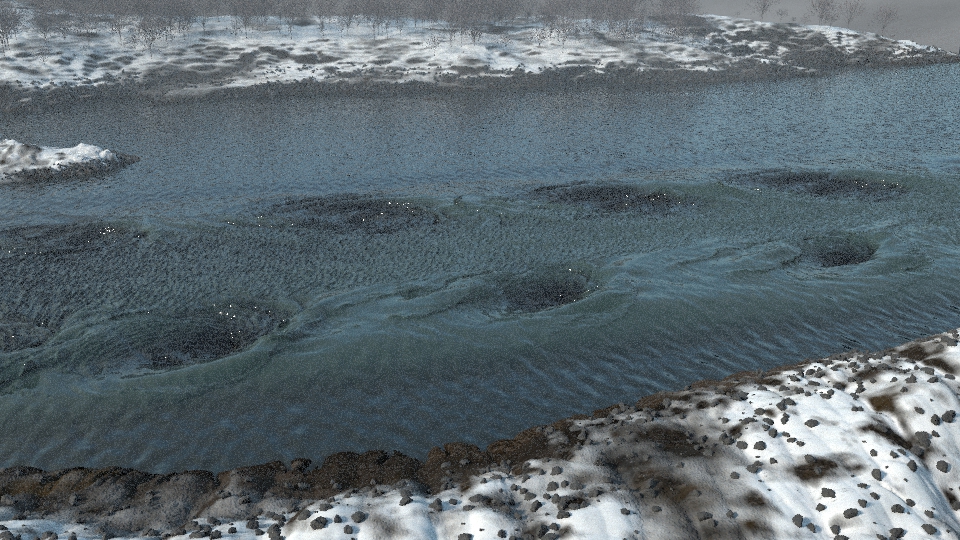
10/30/22 Updates
It has been a difficult week trying to solve my segmentation fault error. The issues would crash Houdini on the first frame whenever I attempted to run a high resolution simulation. After a lot of troubleshooting, it appears to be a version issue with Houdini. I am now working on the 19.5.403 version.
Above is the current simulation, it was 240 frames at .025 particle seperation which took 24 hours to simulate and cache the mesh. In addition, I have been trying to optimize the scene for rendering and improving the materials. However, I am not sure the materials are working quite right with the height fields.
The next major issue to solve is render time. The scene has been split into various render layers to make the rendering more efficient, but the water render is currently clocking in at around 40 minutes per frame. Some of this appears to have to do with the Ocean Spectrum displacements. I am testing a workflow using Redshift for the water rendering, but it is proving to be a more significant change to the setup than anticipated.
10/23/22 Updates
I fell behind on updating the blog this weekend.
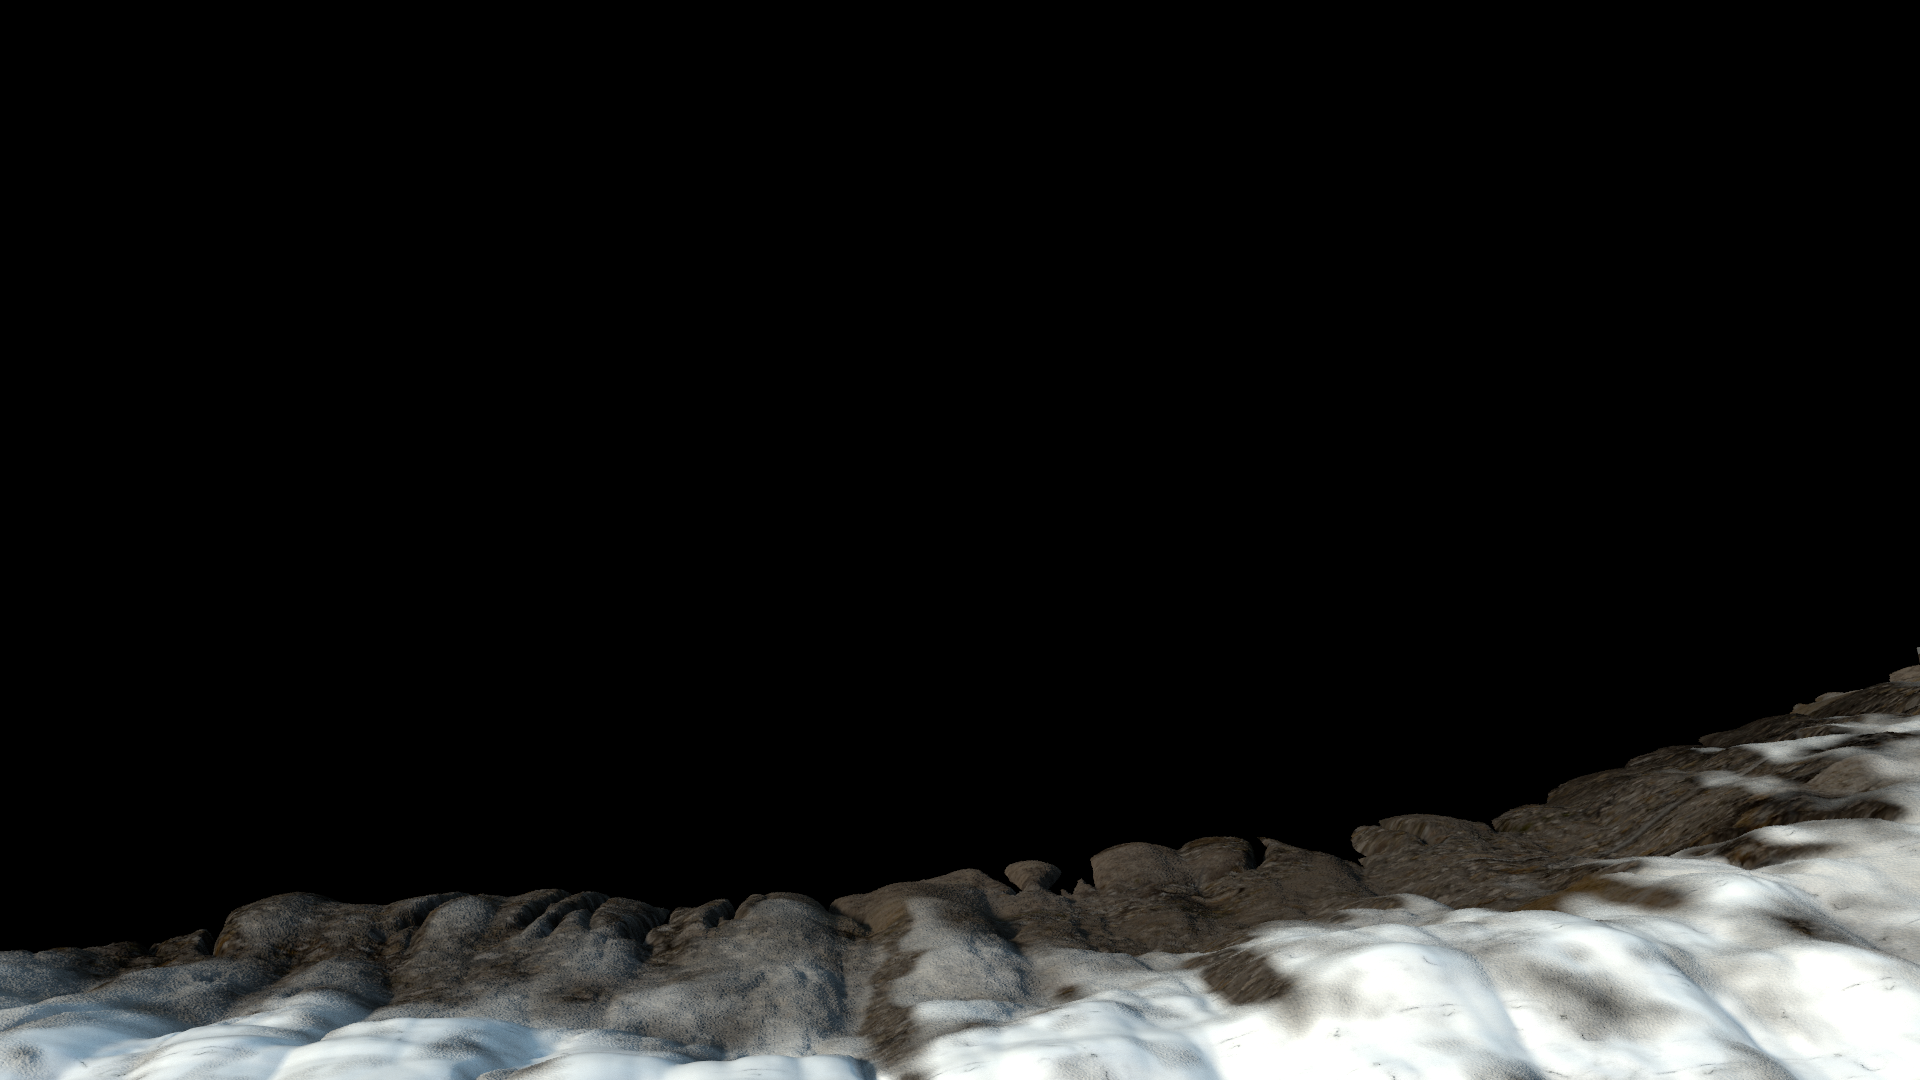
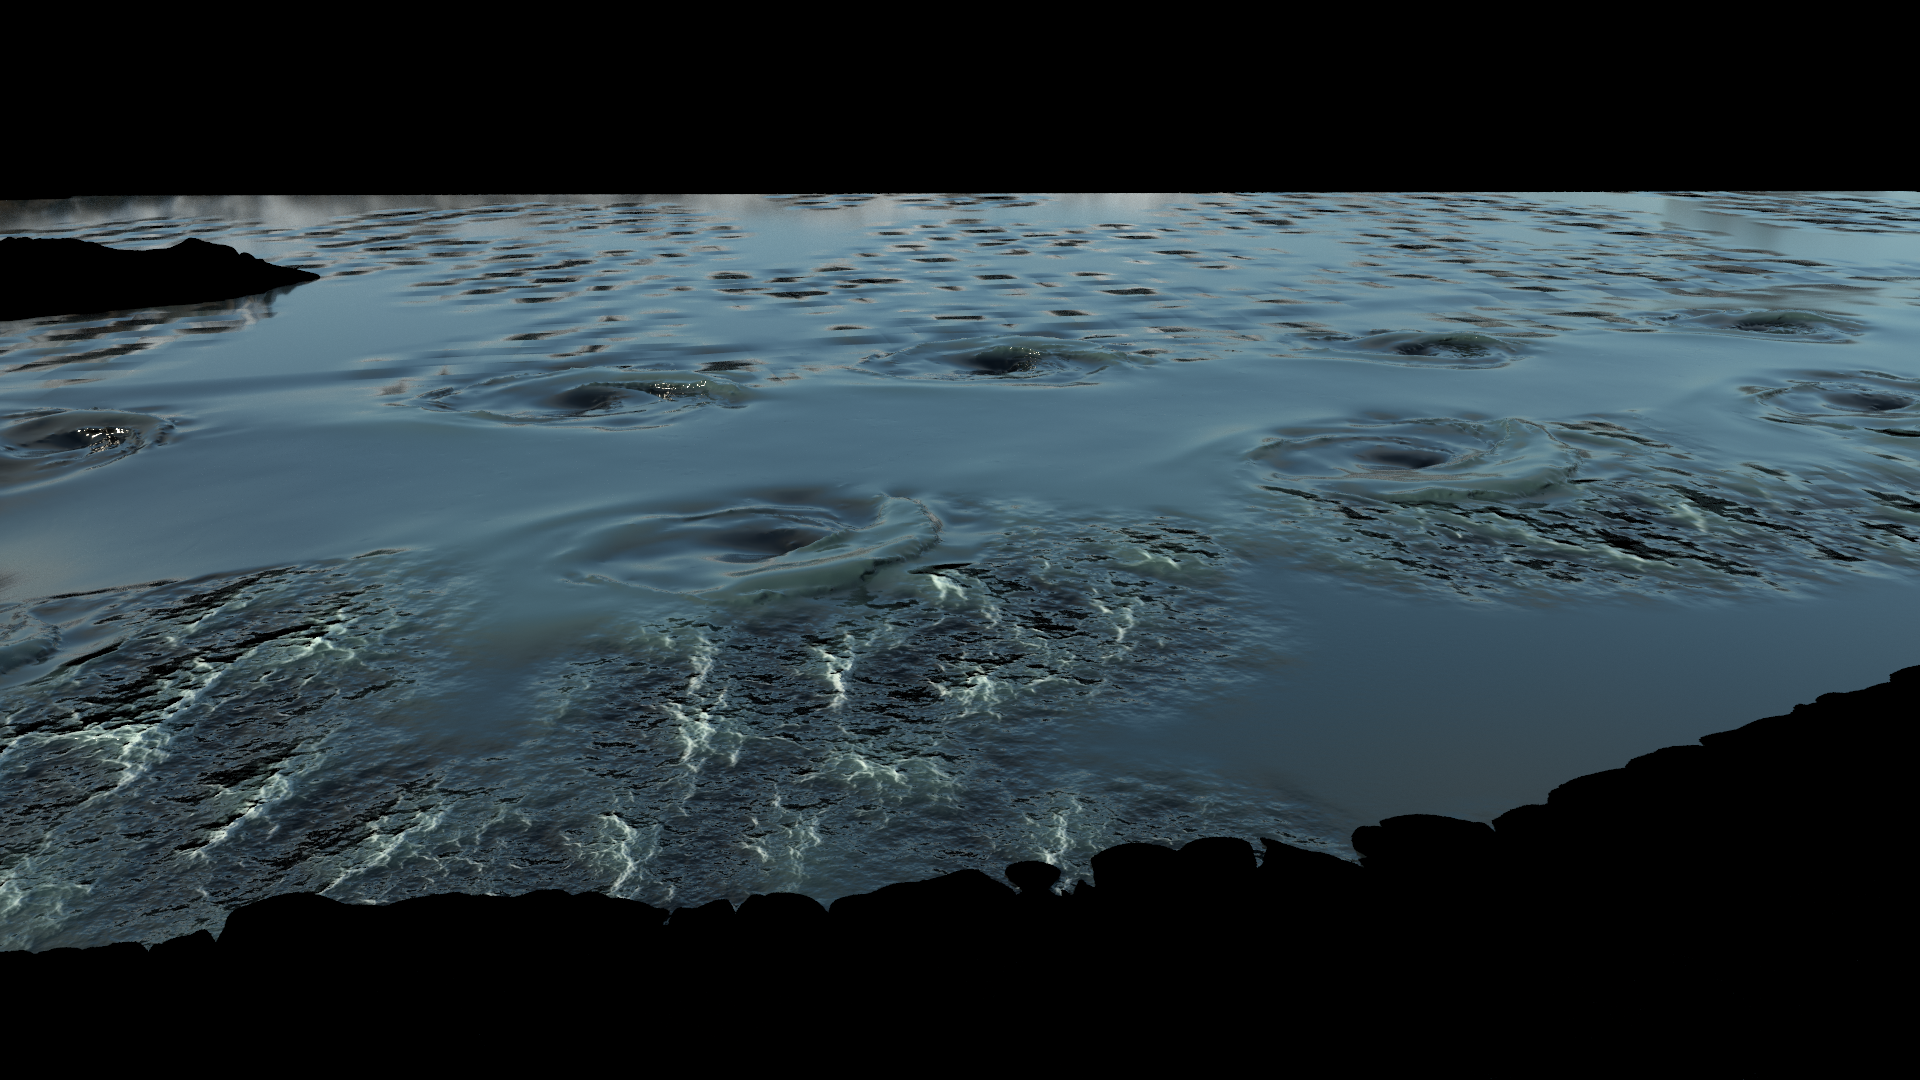
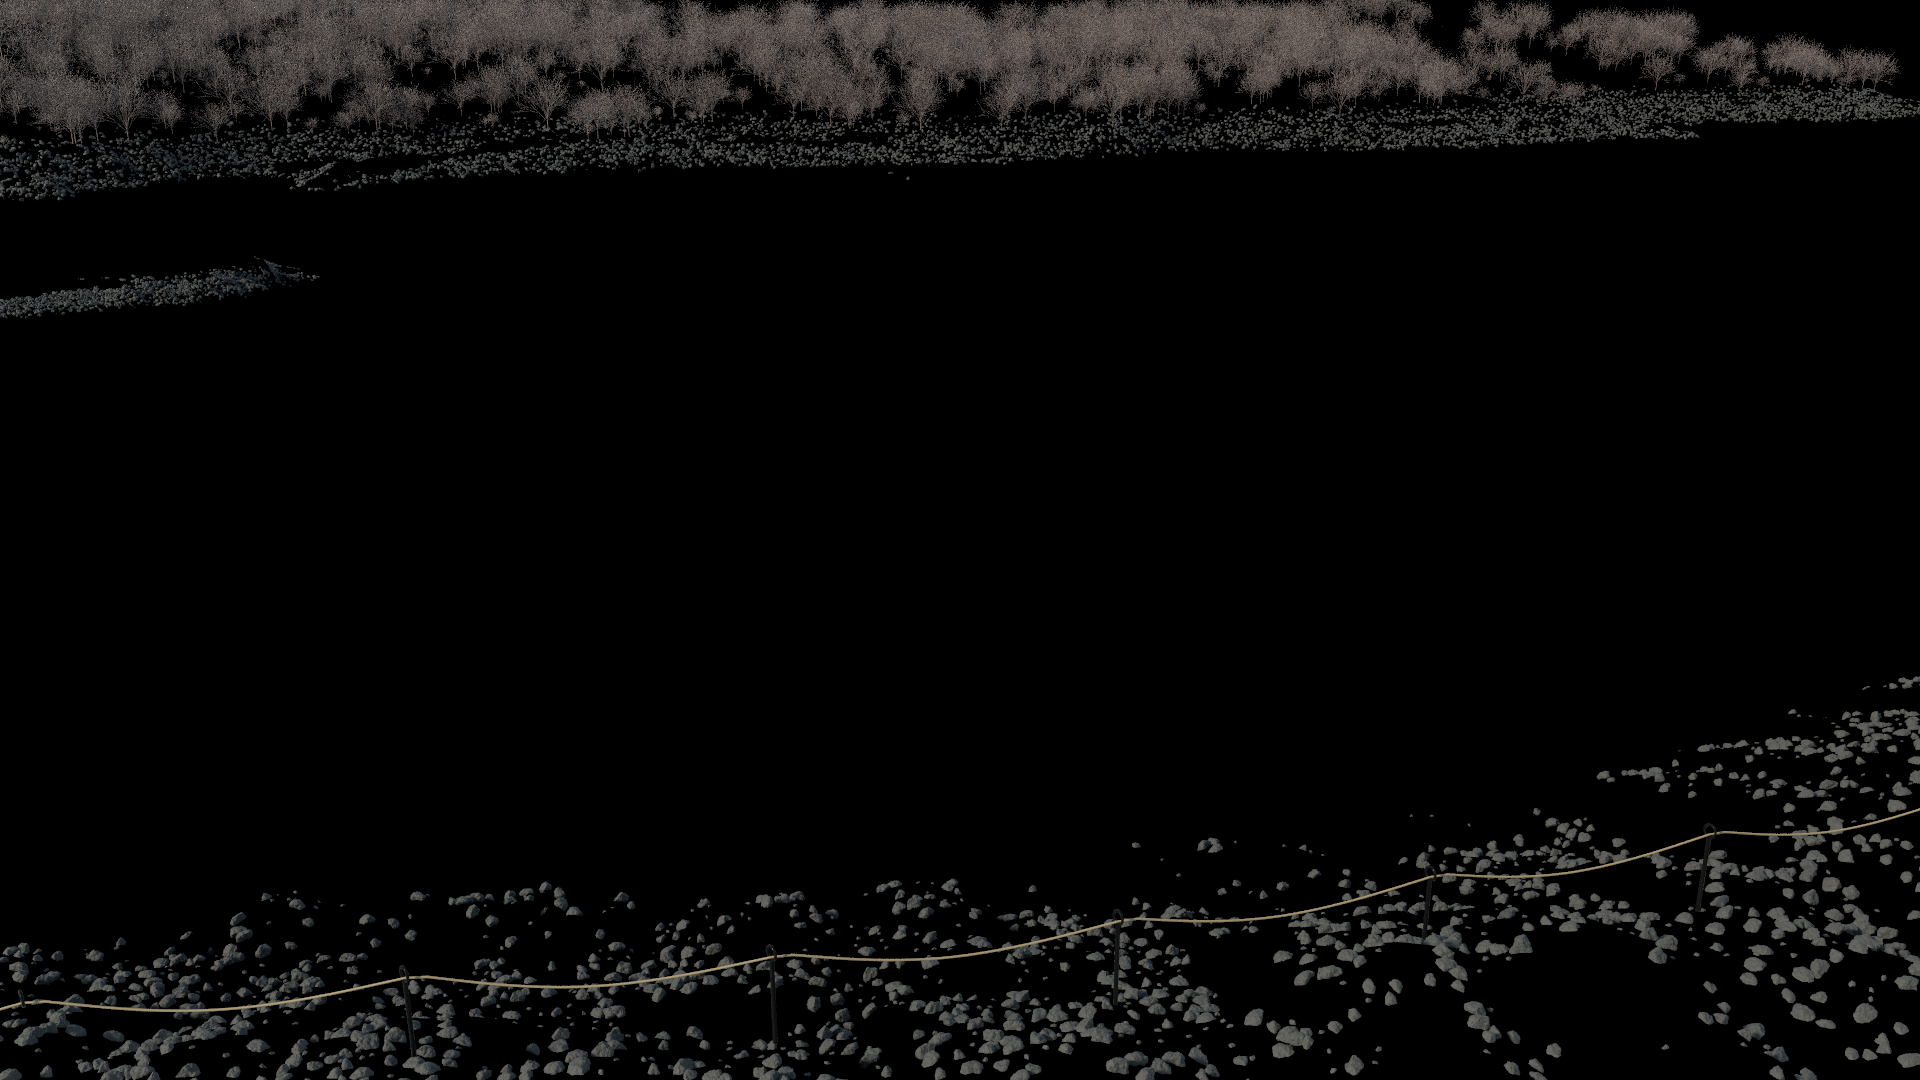
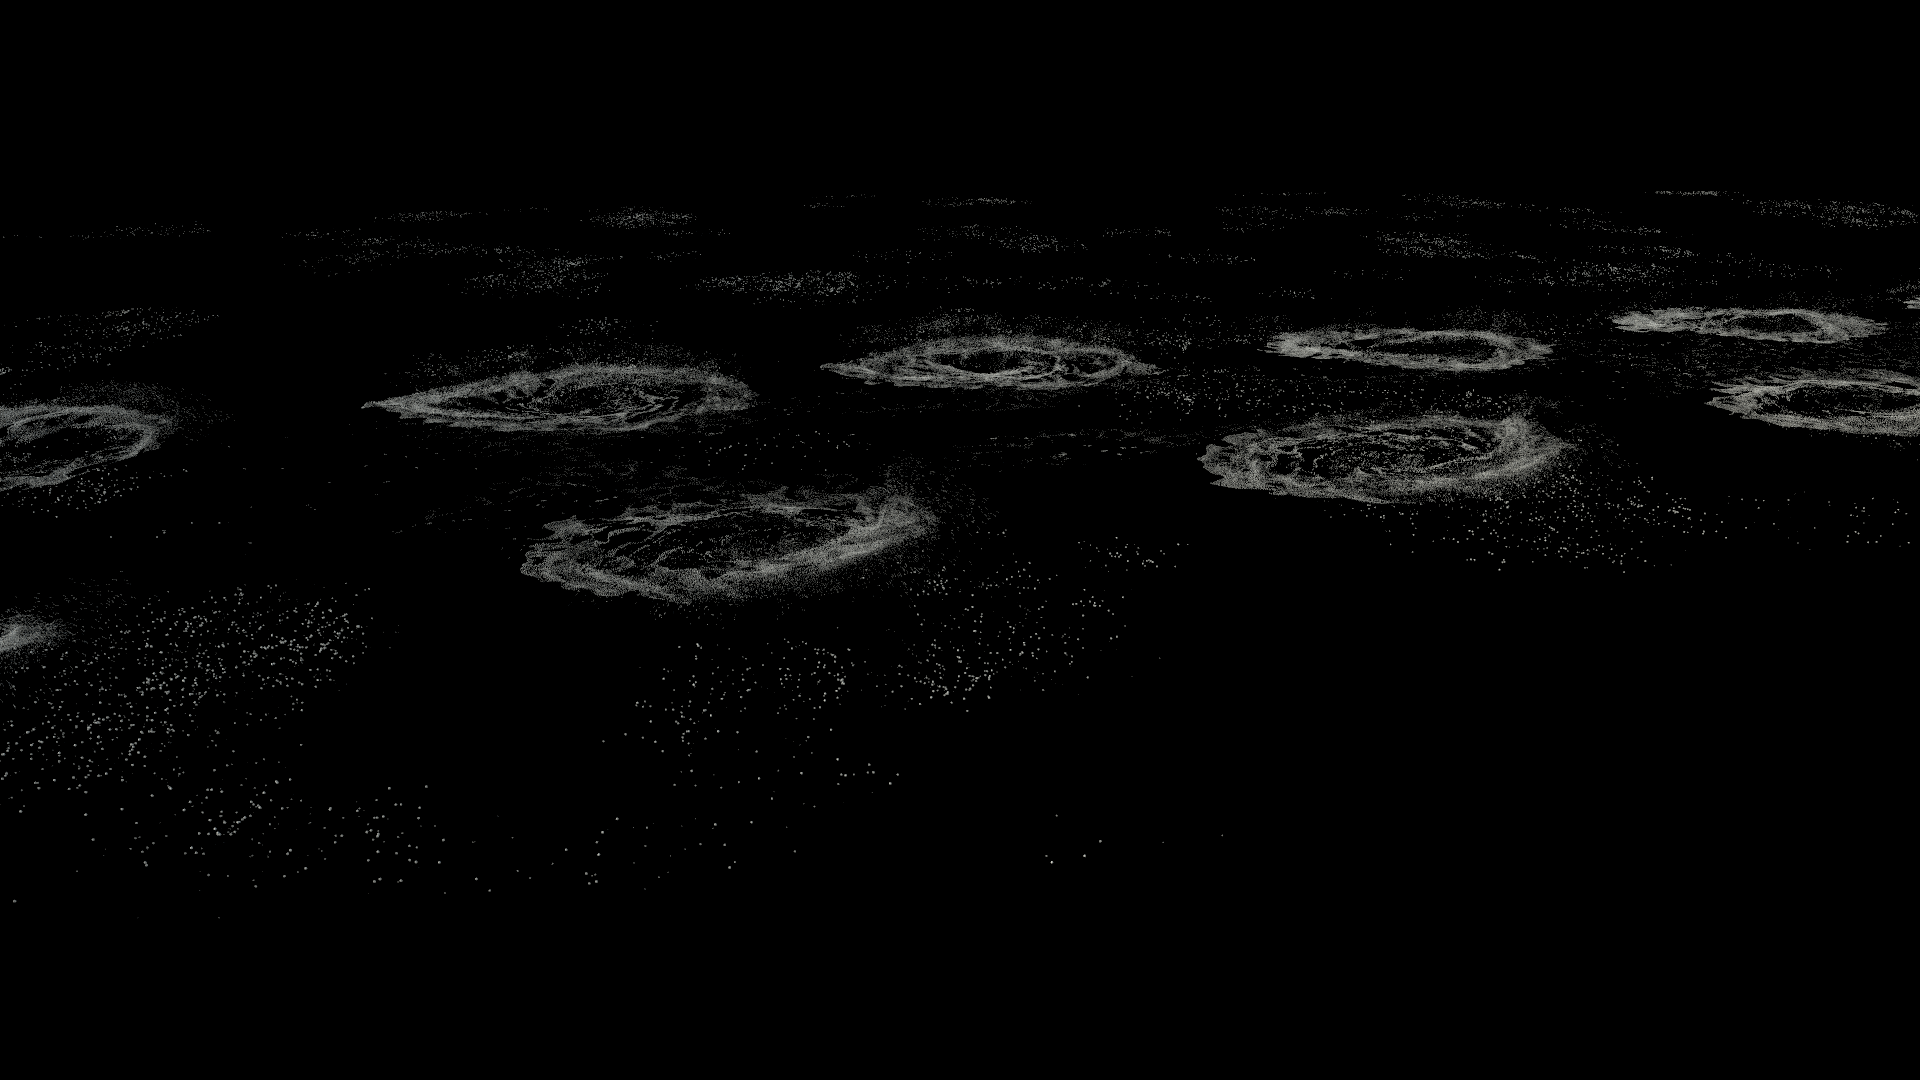
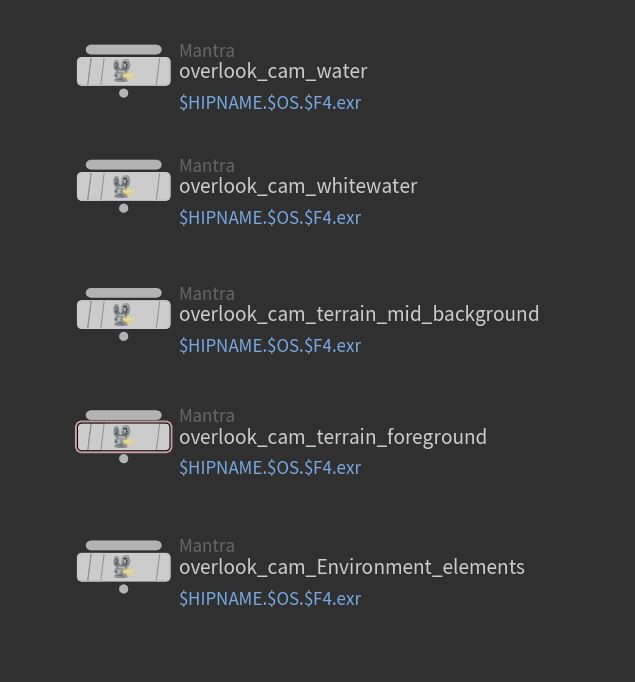
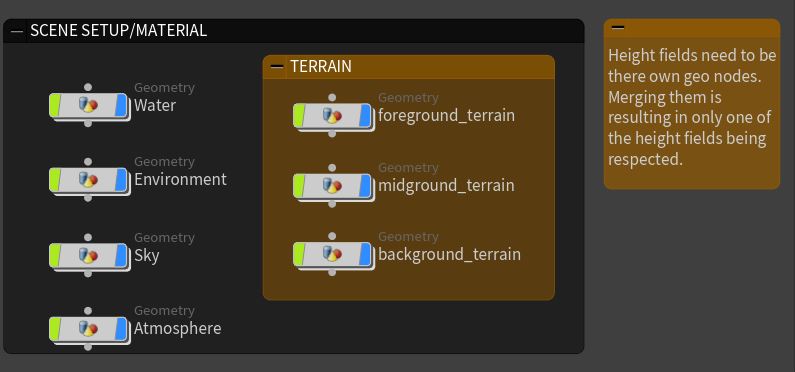
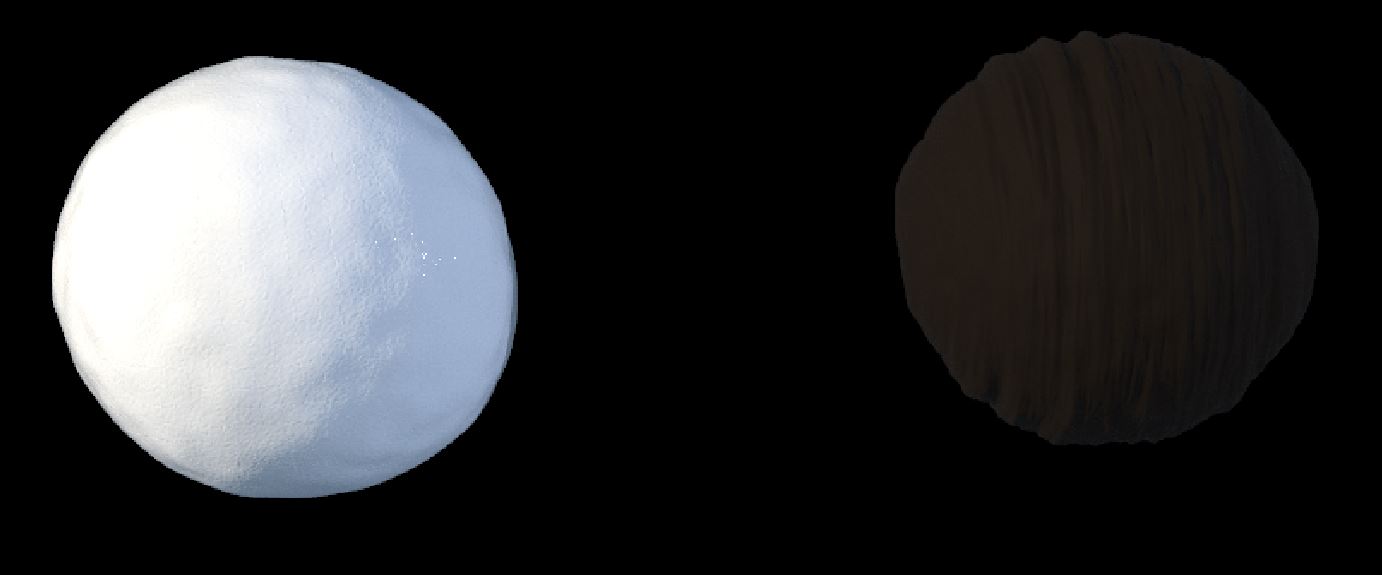
This weekend I separated the various scene elements into different render layers to better manage my time when it comes to finally rendering the scene. The layers are below, with the exception of the atmosphere. The atmospheric perspective will be moving to a post compositing method using either Nuke or After Effects.
Overall the scene scale has increased some to better reflect the real-world proportions of the river and add some more distance between the effects and the shore line as well as the background landmass from the camera. This has increased simulation times somewhat as there are more particles being generated.
Notably, the surface meshing timescale has exponentially increased with the larger ocean padding that is required for the ocean spectra. The current simulation is rather low res for the sake of time.
I am experimenting with rendering the white water as particles rather than volumes. The results seem more defined and promising than the volume approach.
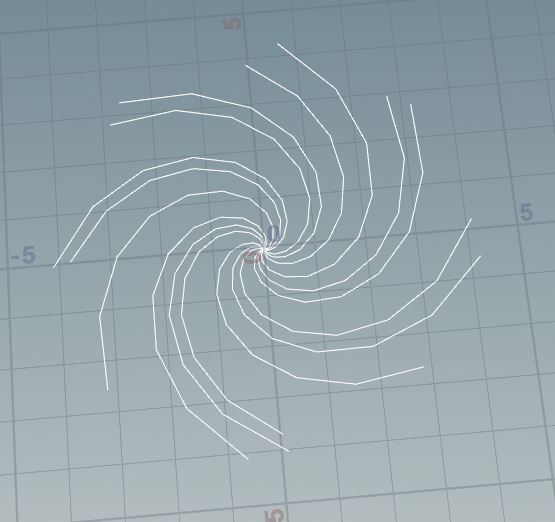
Tests were conducted in a separate test file to attempt to get more detail from the whirlpool velocity fields. Multiple variations were attempted, but the curve and the resulting whirlpool shown here were the best I was able to achieve. However, the river velocity is reducing the details seen in the simulation.
Goals:
- Refine White Water and Whirlpools
- Run a hi-res simulation created to check water detail
- Adjust the white water emissions and look dev to be more organic
- Add motion blur and/or create hybrid volume and particle setup
- Increase whirlpool size
- Correct Ocean Spectra
- Correct the chop vs calmer waters
- Adjust whitewater so it is actually visible
- Test compositing workflow with atmospher, including producing depth map
- Produce at least of a flip book of white water and water or a test render.
Low resolution motion test. Final scene will require a minimum 50 frame pre-roll to get whirlpools and stream up to speed.
10/18/22 Update
I am refining the whirlpool velocity fields and started introducing the whitewater setup. There is still a lot of refinement to work through, but the shot is starting to come together.
Goals this weekend:
- Continued refinement and improvement to whirlpools and ocean. Specifically adding in more detail to the whirlpools and modifying the simulations to have a better sense of scale. Whirlpools may be too large/close to the foreground shore.
- Whitewater refinement: Iterating over the simulation sources, emissions, and material to achieved better definition and more accurate movement.
- Adjustments to the landscape. The rope fence seems too small and the scattered rocks need material detail to show some snow cover to integrate better with the environment.
10/17/22 Update
I have worked through some of the issues. The masking for the Ocean Spectrum textures has been corrected and is not applying to the calm areas of the FLIP fluid simulation. There is a slight line at the boundary of the tank, which I think can be fixed with some adjustments to the flatten geometry settings.
The current whirlpool simulation is too strong. With the recent changes, the settings were disrupted. This week will focus on refining and fixing the FLIP simulation and fully integrating the white water simulation.
The ocean spectrum is also throwing off the scene scale slightly. This will be addressed once the simulation is more refined.
Render time: 10:41 per frame, local render.
Masks
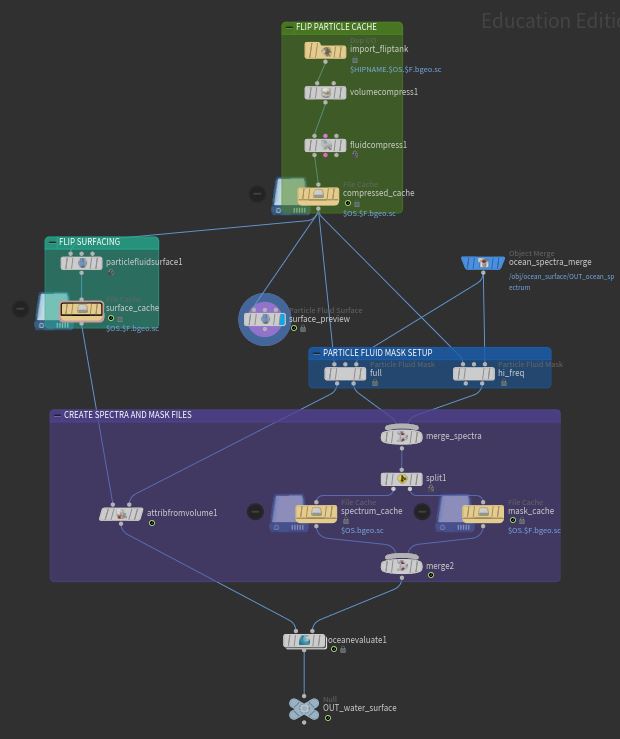
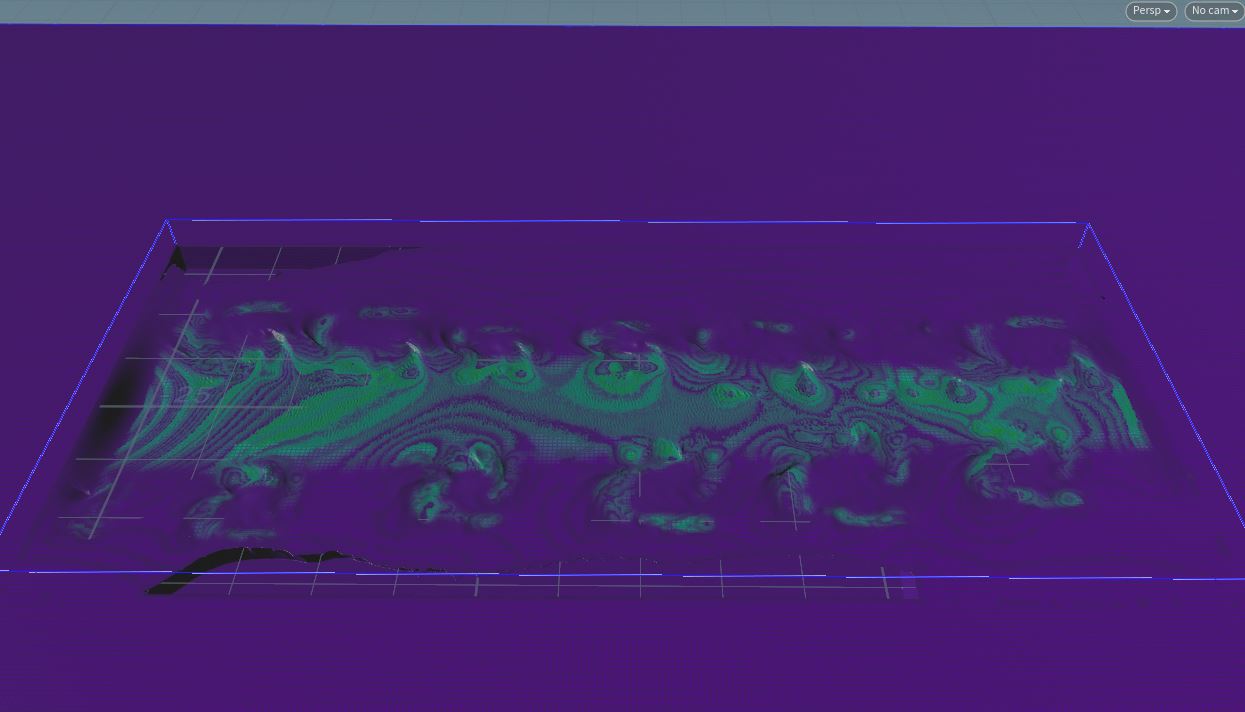
The masks allow the ocean spectrum waves to be applied to the FLIP fluid simulation. Two masks were created, one to handled the main integration of the full ocean setup, and a secondary mask to apply just a little bit of the high frequency waves to the FLIP fluid.
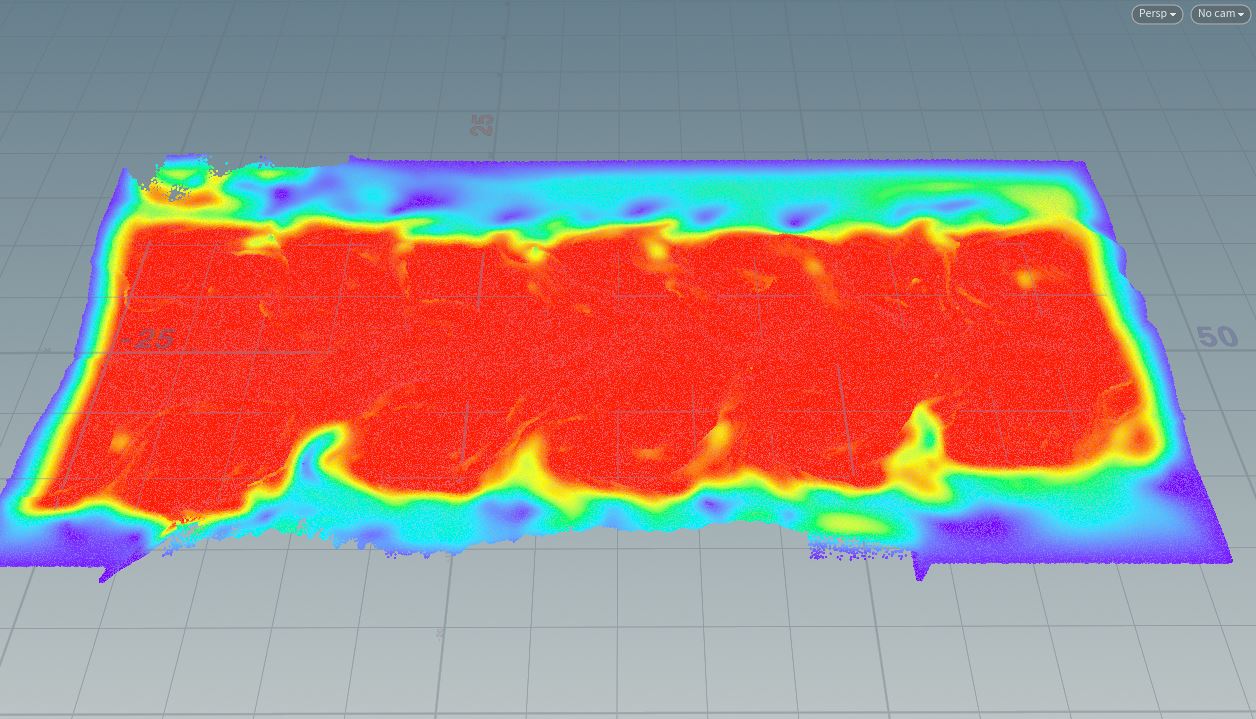
Main Mask
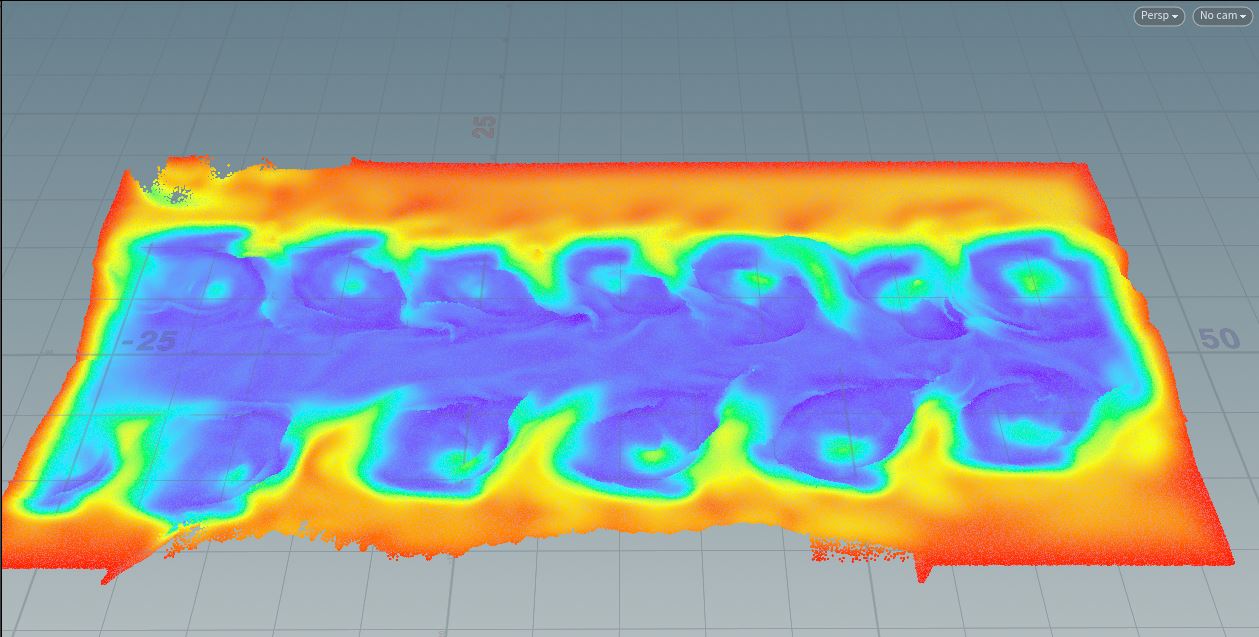
High Frequency Mask
10/16/2022 Updates
Currently working on:
- Integrating the FLIP fluid simulation with an Ocean Spectrum setup
- Refining textures and lighting
- Tweaking whirlpool settings and sourcing
Goals this week:
- Major progress on white water simulation
- Continued refinement on water simulation
- Cleaner integration between FLIP and Ocean Spectrum
Current Settings:
- Frames: 72
- Particle Separation: 0.02
- Particle Radius: 1.2
- Water simulation time: 9 hours, 27 minutes
- Surface Cache Time (Separation bumped to 0.04): 45 minutes
- At the 0.02 separation value, it completed in 6 frames in 35 minutes
Height Fields
A great deal of testing has gone into shading methods with the height fields. Current difficulties with the height field shading and render stem from detail limitation in the height field mesh. In an attempt to keep the scene as efficient as possible, I am avoiding converting the height fields from volumes to polygonal meshes. The Polygon meshes produced from the height fields are very heavy in the scene file and would require an alternative texturing method as the HF mask falloffs are not respected.
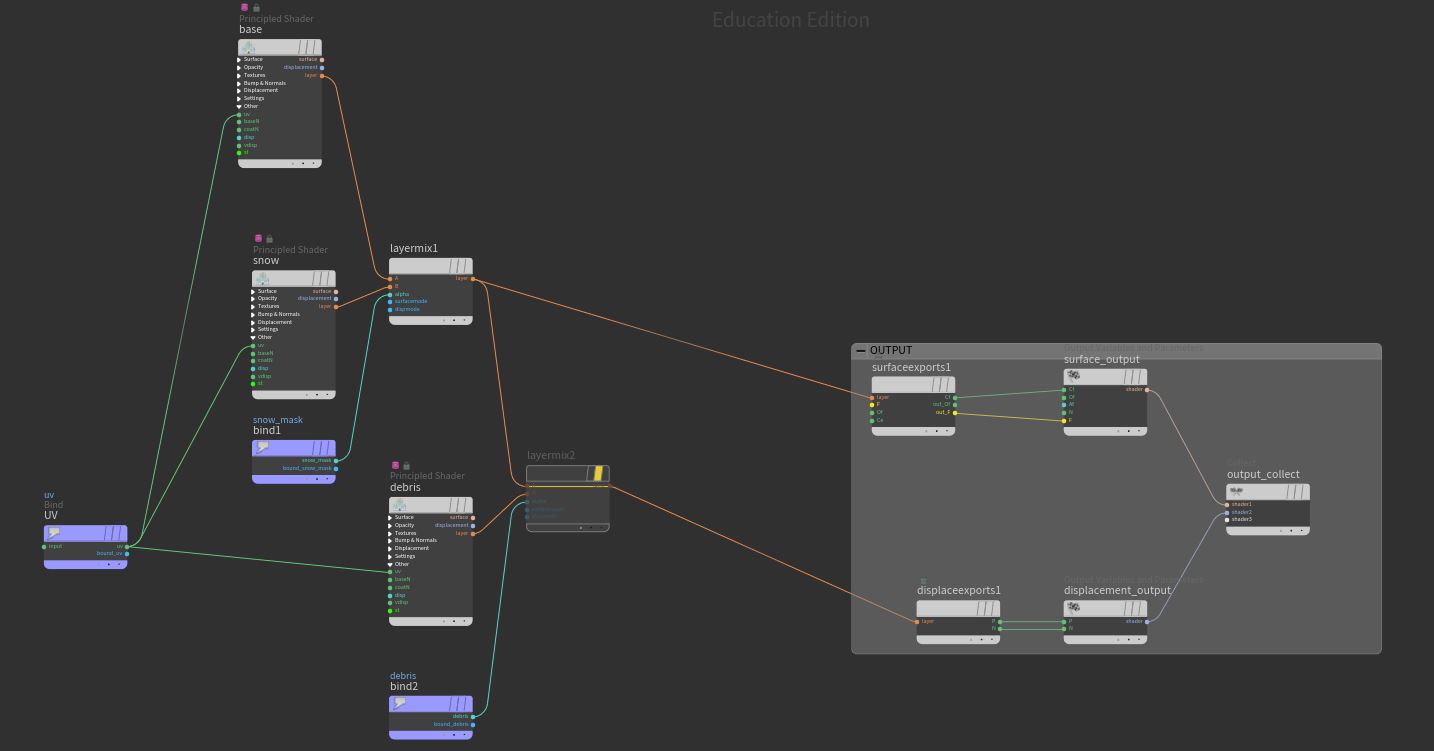
To approach the shading of the height fields, I am working with a layered method in the mantra material builder (thank you Professor Folwer for this technique). Using a material builder allows me to bind any masks created with the height field which enables me to mix various material together.
Typically my workflow involves separating the scene elements by anticipated render groups for compositing. Within each geo node for the scene setup, group nodes are used to isolate the various elements in which to attach materials. This workflow reduces the amount of material nodes, making it easier to adapt and change if needed.
The height fields have introduced complications in this work flow. Traditional merge methods for the landmasses result in only one of the three terrains showing up in rendering or as collision geometry. I have not found a good method within the height field tools to combine the terrains into a single entity. To work around these issues, I have merge the individual terrains into their own respective geo groups and applied a material node to each height field. It is a minor inconvenience, but the work around is working fine for this scene.
Ocean Spectrum Integration
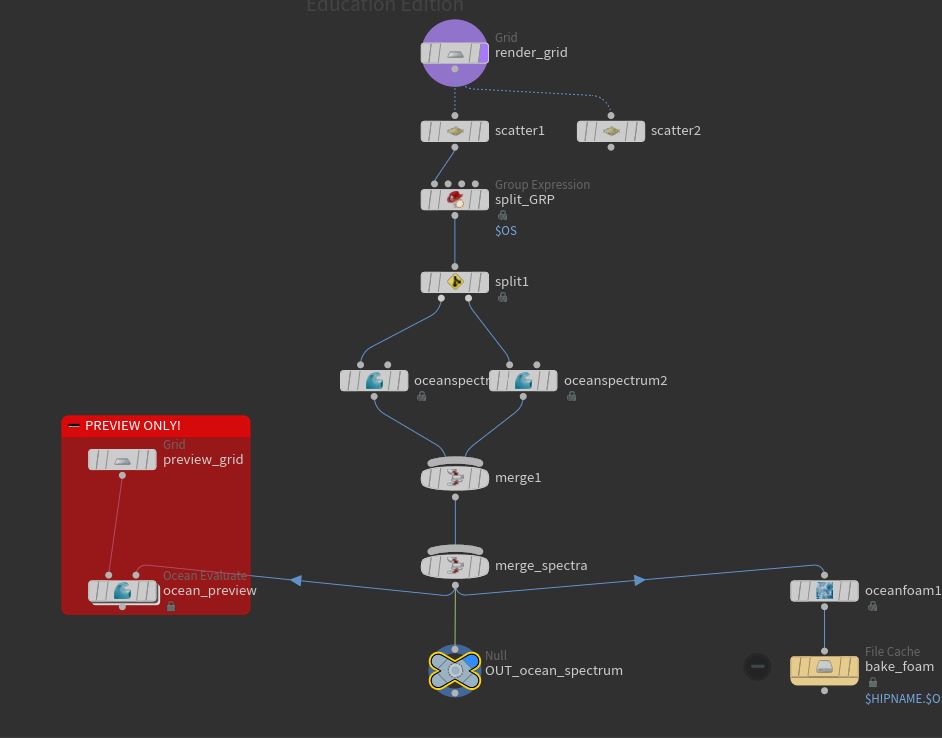
Up until this point in the project I had been avoiding integrating the Ocean spectrum with FLIP fluid. The ocean spectrum investigations are a direct result of the scene size/complexity continuing to grow. With the introduction of a more complete environment, the FLIP fluid tank would have to exponentially grow to fill out the river area of the shots. This is introducing a lot of particles and simulation time for low activity regions of the shot. Using FLIP fluid for filling out the scene, in my opinion, is inefficient and unnecessarily cumbersome to the simulations. Current setup is derived from the Side FX Ocean Masterclass video.
There are three major areas of improvement for the ocean integration for me to move forward with the technique:
- Low activity areas of the FLIP simulation need to have the ocean waves added in order to be convincing/realistic. This may require adjusting the flat tank to a guided tank simulation setup.
- The boundaries of the FLIP fluid have been unpredictable. Often times creating noisy or jagged edges where the ocean and FLIP fluid meet.
- The Ocean Spectrum setup needs to be refined to give a better sense of depth with an appropriate level of wave and chop. Currently, the setup seems finicky. Changes to the values either cause the waves to barely show up, or result in too large of an effect. My lack of experience working with the Ocean Spectrum setup is likely the cause of this issue.
The latest iteration appears to show that the mask will need refinement for different resolutions. The previous simulation used the same settings, but the mask was much more pronounced.
This most recent simulations particle count was quite large, and the surfacing node had to be adjusted to make the caching times reasonable. As such, this version lost details during the meshing phase.
Comparisons
Current render is a marked improvement, however, the foreground terrain still feels low resolution/fake. Converting the height field to polygons may be required in this one instance to allow for more minute details to be displaced either through texture or VOP/VEX nodes. I have attempted to use displacement or bumps on the height fields, but have not been impressed with the results. A texture based solution on the height fields has not been abandoned yet, but requires more testing.
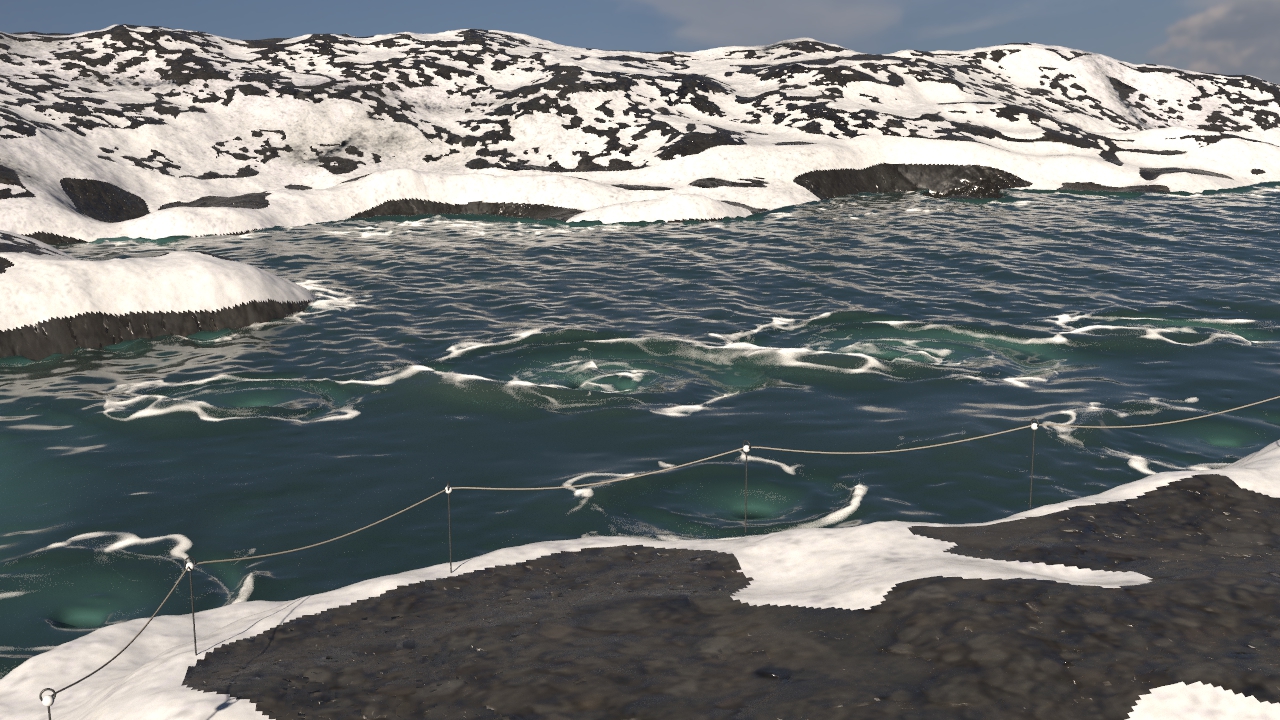
Early Render Test
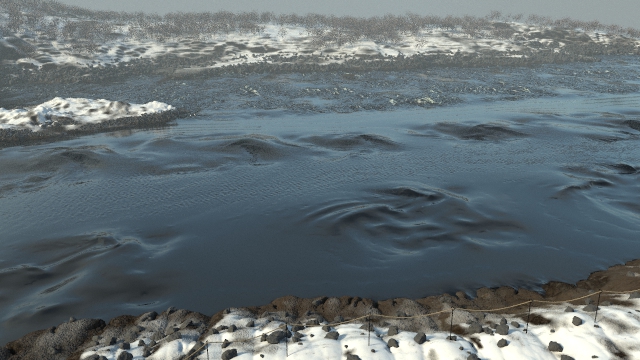
Current Render Test
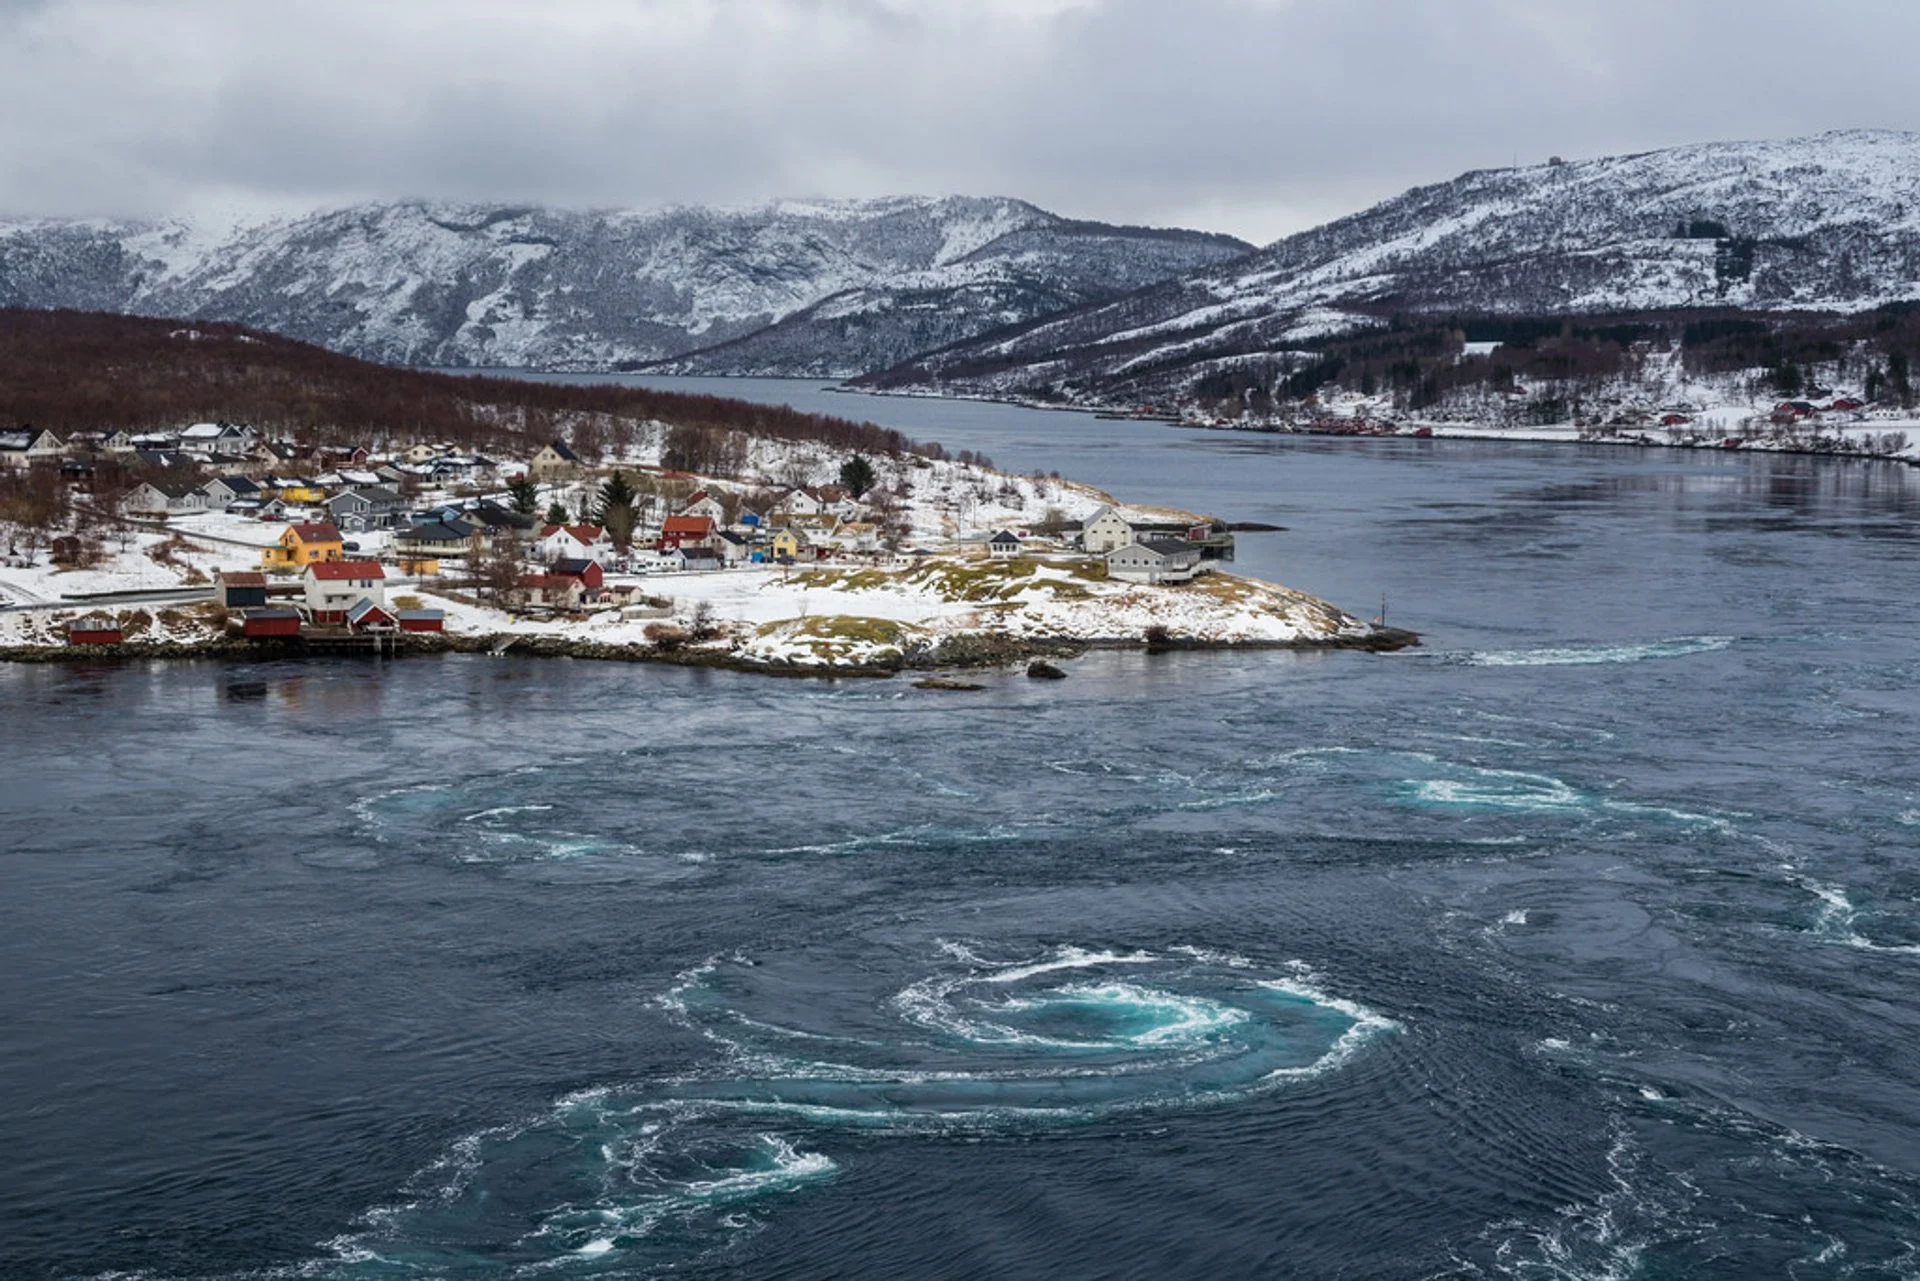
Reference Image.
10/14/2022 Updates
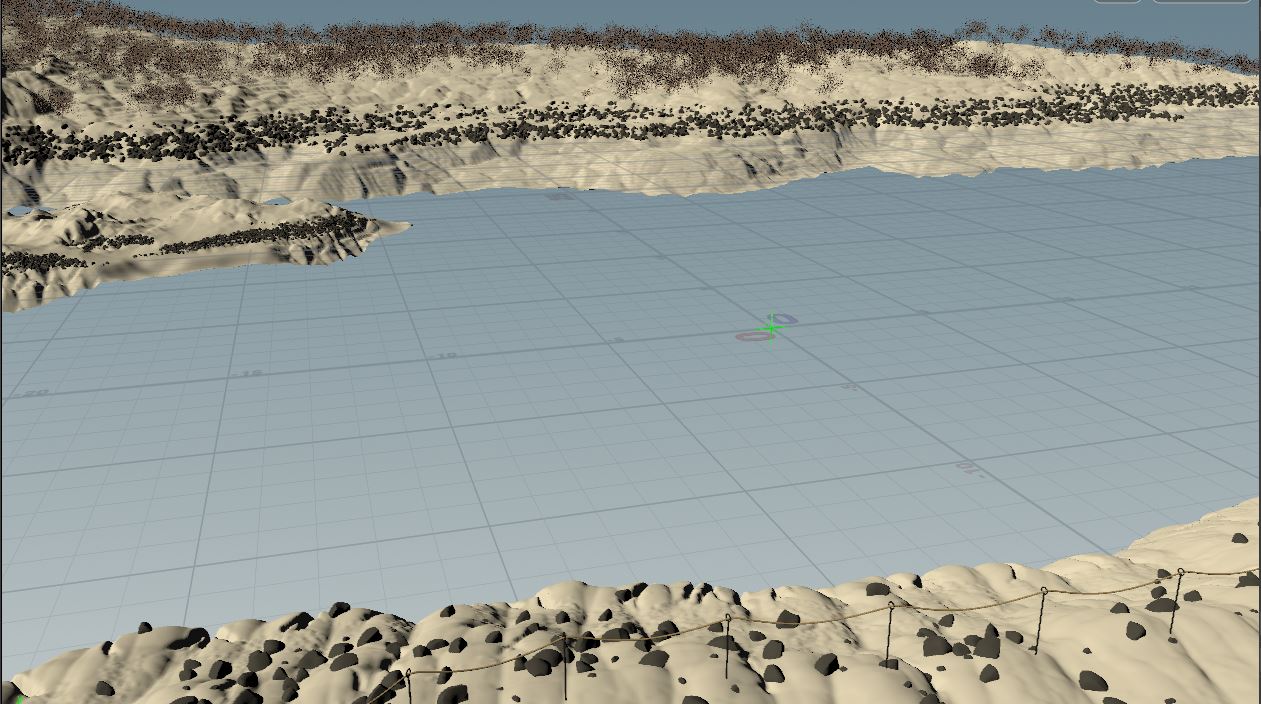
I have dedicated the better part of a day or two to reworking the landscape geometry to try and achieve a more realistic and interesting landscape. The results shown here are created using height fields, copying to scattered points, and procedural modeling for the rope barrier.
The landscape is close to the desired final look, but will require refinement through additional details and texturing. Most of the refinement will focus on the foreground elements as the plan is to add some atmospheric perspective to de-emphasize the background landmass and add to the scene’s mood.
Height Field Creation
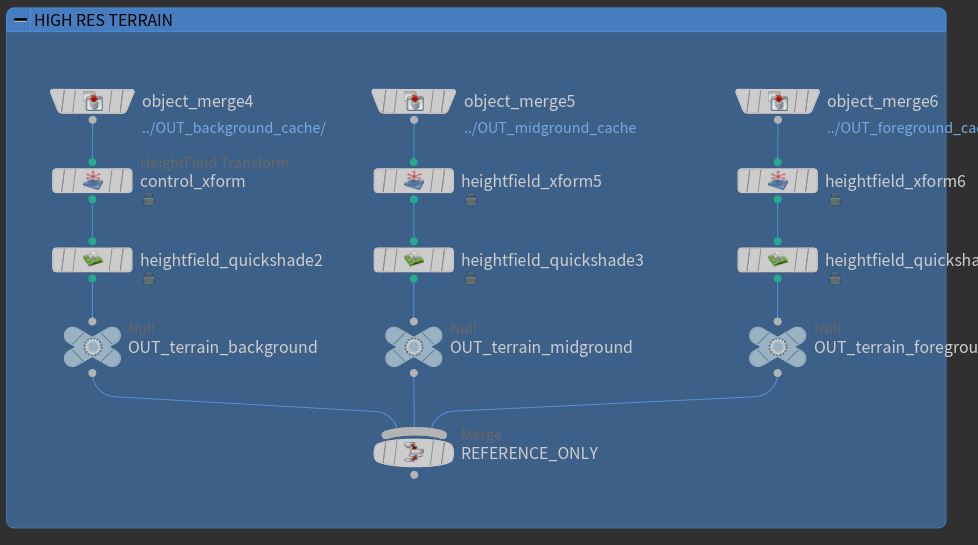
The terrain of the scene is generated using height fields. To create a fairly accurate landscape, a topology map was downloaded for the Saltstraumen area and brought in as the initial data for the height fields.
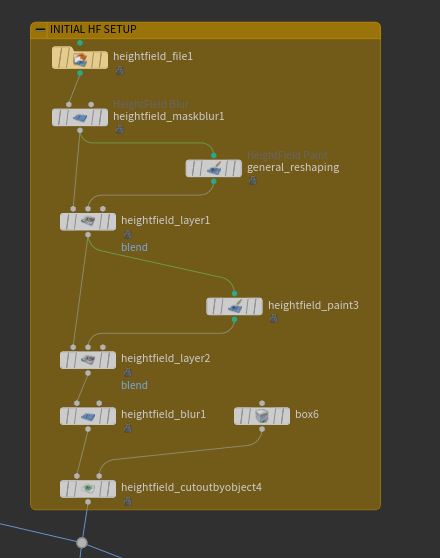
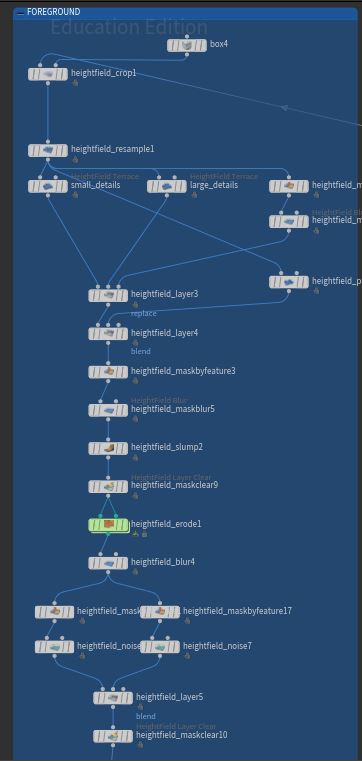
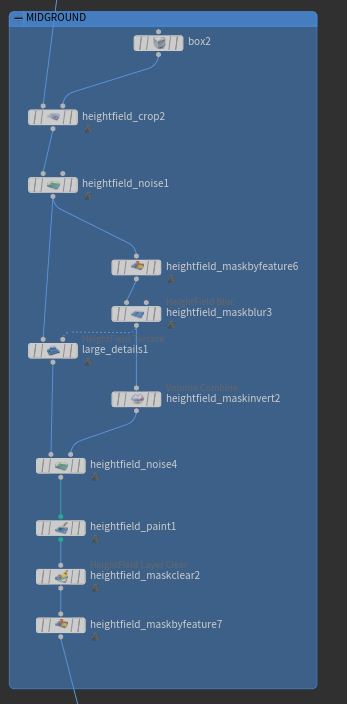
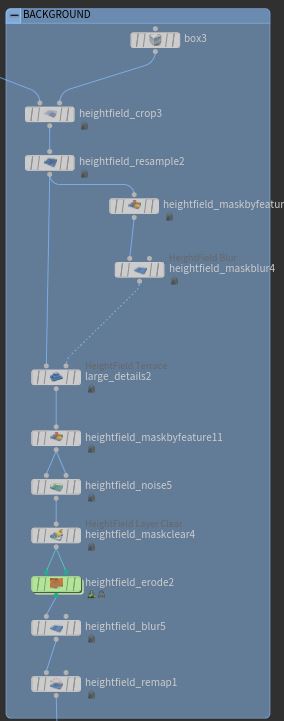
Additional procedural sculpting of the terrain was needed due detail limitations of the original topology map. To ensure the height fields are as efficient as possible, the foreground, midground, and background were split from the initial setup and handled separately.
While learning about height fields and working through some of the challenges of making this landscape, it became clear that getting realistic detail in the landscape requires a ridiculous amount of voxels. Although voxel data is typically fast to calculate, the height fields quickly became cumbersome with the level of detail I was trying to capture.
By separating the different regions of height fields, I was able to handle the resolution requirements more specifically based on how close to the camera each particular land mass is to the camera. While I am fairly happy with the terrain results, textures and additional geometry details needed to be added to sell the realism of the scene.
Preparing Height Fields
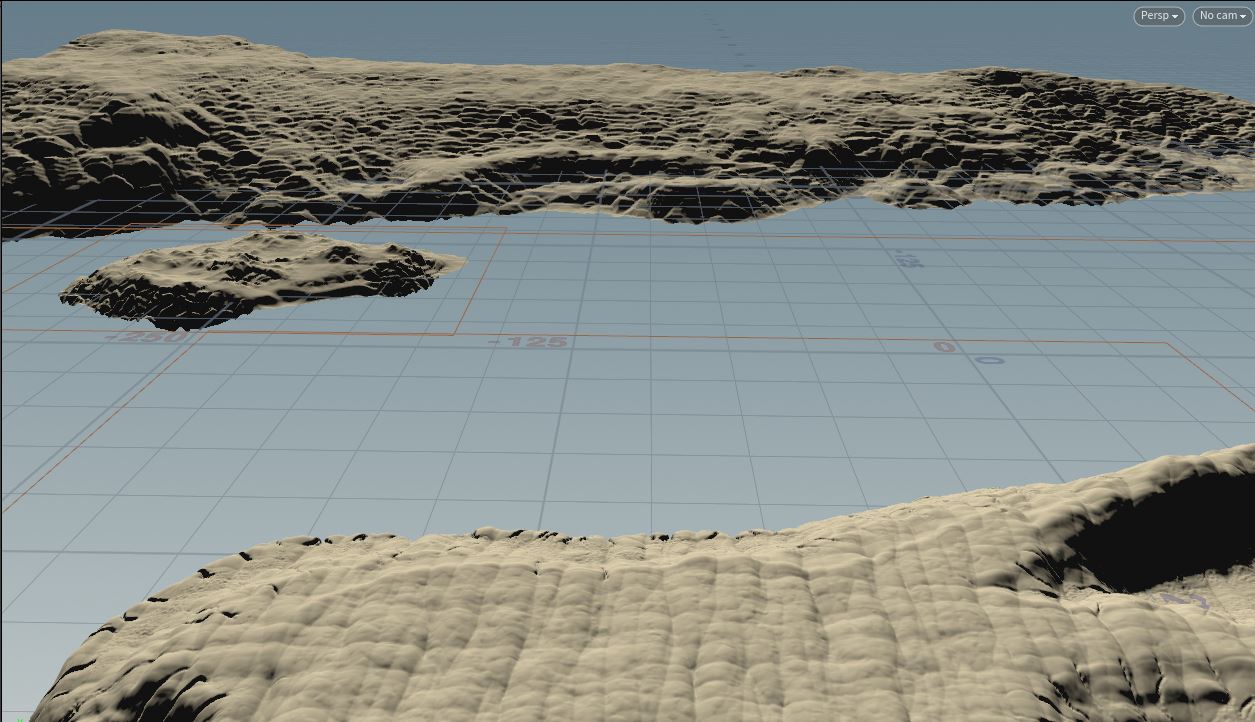
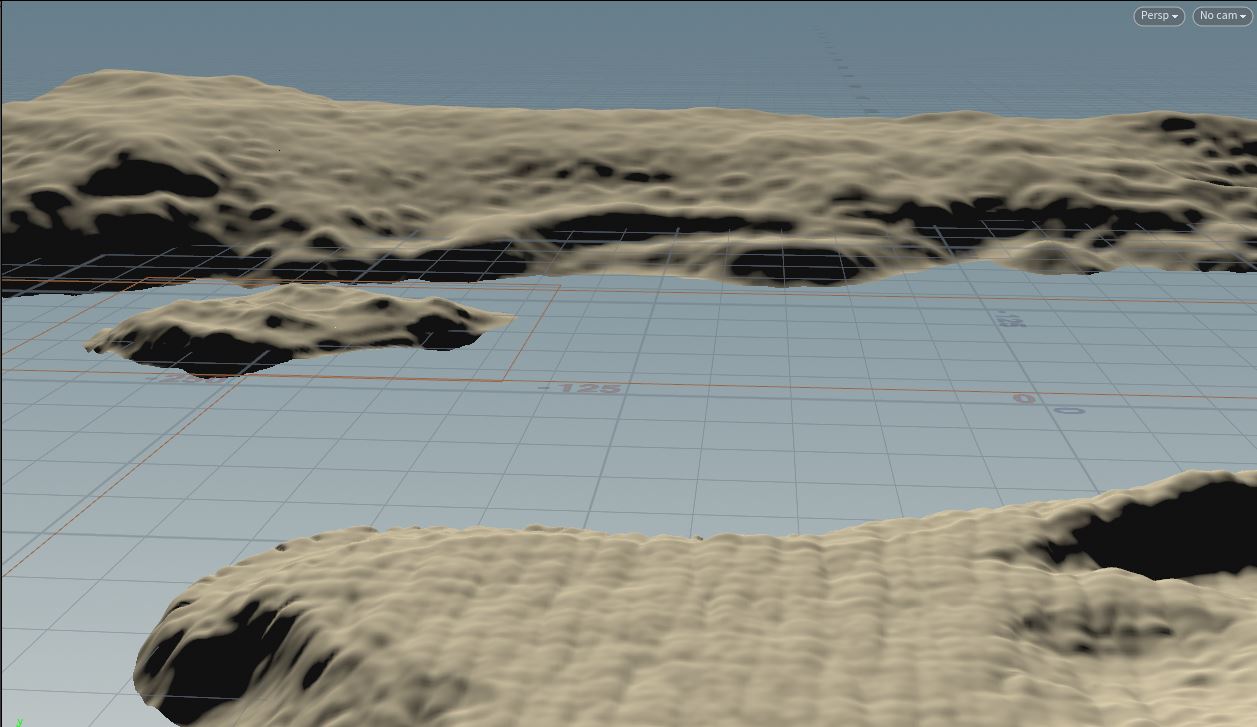
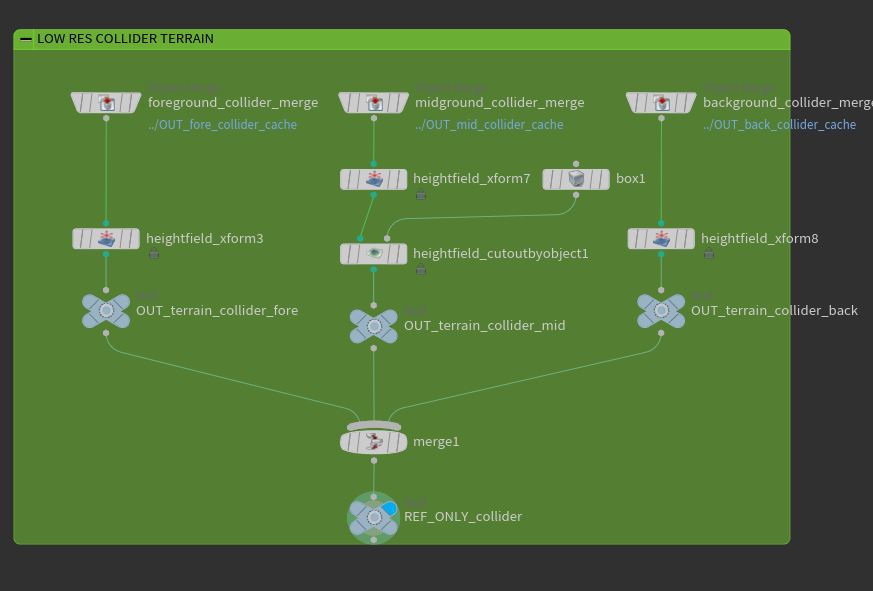
The height fields are used for rendering and collision data for the simulation. To facilitate both use cases, a high resolution and low resolution version of the landscape were created for rendering and collisions.
Low resolution height field setup. These severely reduced volumes will be used for collision geometry in the FLIP simulation.
Note: the current height fields as collision objects did negatively impact simulation times. I may need to reduce the detail further, but have concerns it will reduce the accuracy of the collisions.
Masks
A few masks were created using the heightfield tools, some to isolate terrain sculpting. In the case of the fields below, the masks are used to limit scattering of points for some of the terrain details such as the rocks and trees. The snow mask was created solely for future texturing efforts.
Tree and Rocks
I am working towards a wintery scene for the final render which allows me to do the bare minimal modeling needed for the trees. The references images posted in early blog entries show the majority of the tree line consists of deciduous trees, which allow the models to consist of bare branches for the time of year being portrayed.
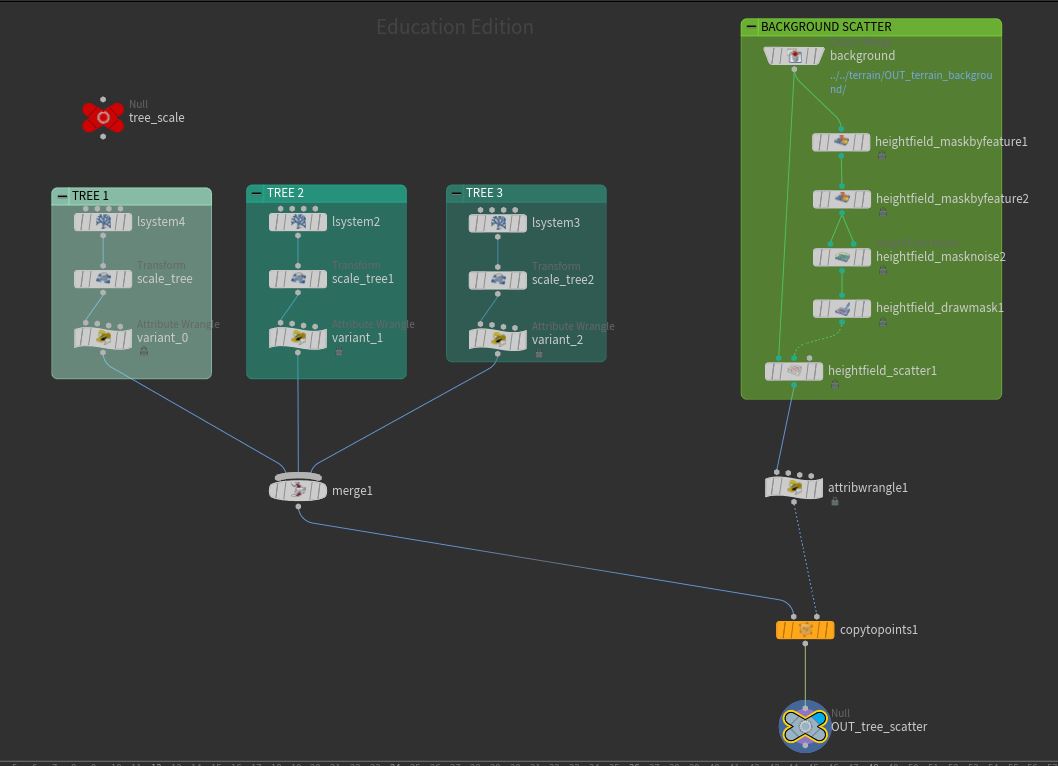
Three variation of trees were created using L-systems. The choice to use L-systems instead of the LABS tree tools was to ensure the scene would work with the render farm for rendering if possible. However, the cache sizes may still be a barrier to render farm renders.
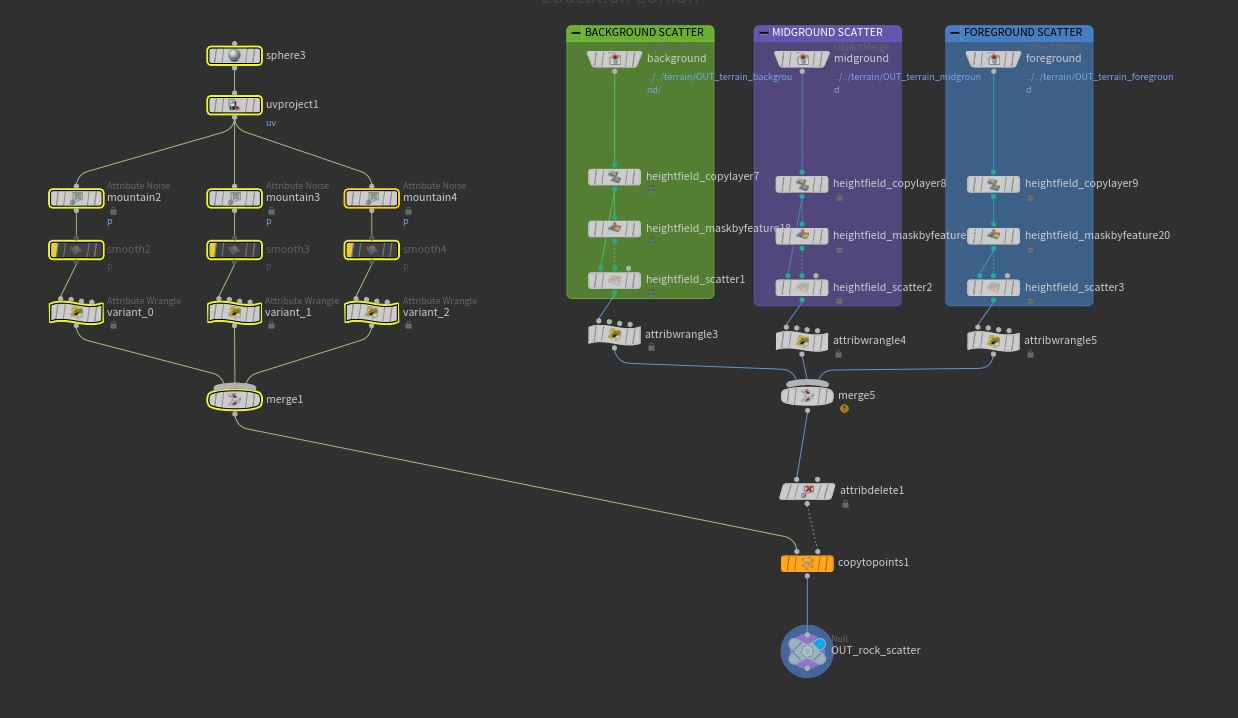
The trees are copied to the scattered points on the hieghtfield using the tree mask volumes to limit distribution. The geometry is packed and instanced to optimize the scene.
The rocks in the scene are rather small details in the scene and, with the exception of the foreground, are far away enough that the details of the geometry is irrelevant. To create the rocks, a sphere is processed through three mountain nodes to create a few variations. These three versions are copied to the scattered points from the height field with pack and instancing to reduce memory usage.
10/10/22 Updates
Started an initial pass on texturing. I have been looking at a snowy setting, so I used the heightfield masks to place different textures for the stone and snow. This approach, so far, has some drawbacks. The masks created by the heightfield look fine in viewport, but when trying to render the water disappears if the heightfield is left as a heightfield voxel.
Research into texturing terrains showed many different techniques, but I started with just converting the heightfield to polygons and trying to work with the groups created. The result is not refined enough, and the point groups lose the falloff from the masks, resulting in jagged edges to the snow. The materials I am currently using is throwing off the scale and the results look fake at the moment. This is especially true in the foreground.
The next iteration of the textures, I will be exploring exporting the height, flow, and mask data from the height field and using those maps in Substance Painter to mask the different regions needed for the materials. I believe this will give me the best control and will preserve the gradation of the masks.
Lighting is just an HDRI at the moment. The light and shadow patterns are too flat and the color is too warm compared to the reference.
White water will need more time to get under controls, this current version is driven only by vorticity and curvature. The white water simulation will need time to refine, but I felt it was best to start adding these effects now so they are being refined with the water simulation.
Additionally, the sense of scale with the water is off. The waves in the background are too large and makes the river look too narrow.
Current water FX. While attempting to add variation through noise, adding weighted attributes to the curves, and randomizing the arms of the spiral arms, some issues were introduced to the whirlpools. I have removed most of these efforts as they were not stable and to troubleshoot the effects quickly, I have been working in a higher particle seperation (.1).
10/5/22 Updates
Current iteration of the simulation is below. I adjusted the height and radius of the source curves in this version as well as updated the collider to a reduced version of the height field and added a POP Kill for any particles inside the collider. Still some collider issues to fix and I need to blur my volume velocity field somewhat to reduce that strange bunching effect on the whirlpool. Reducing the velocity with age may be needed as well as the whirlpools become chaotic when they meet further down the stream.
Settings:
Frames: 72
Simulation Time: ~ 3 hours 30 minutes
Particle Separation: 0.025
Particle Radius: 1.2
Grid Scale: 1.75
Particle Count: 60 million
10/4/22 Updates
The landscape terrain has been updated to get more detail and widen the river so there is more room for the whirlpool effect. The network was also updated to cache the heightfield to reduce computation time. A simple rope fence was created to reflect the reference images I have been using and help give the environment a better sense of scale. A tree model was generated with L-systems and scatter using the height field scatter setup.
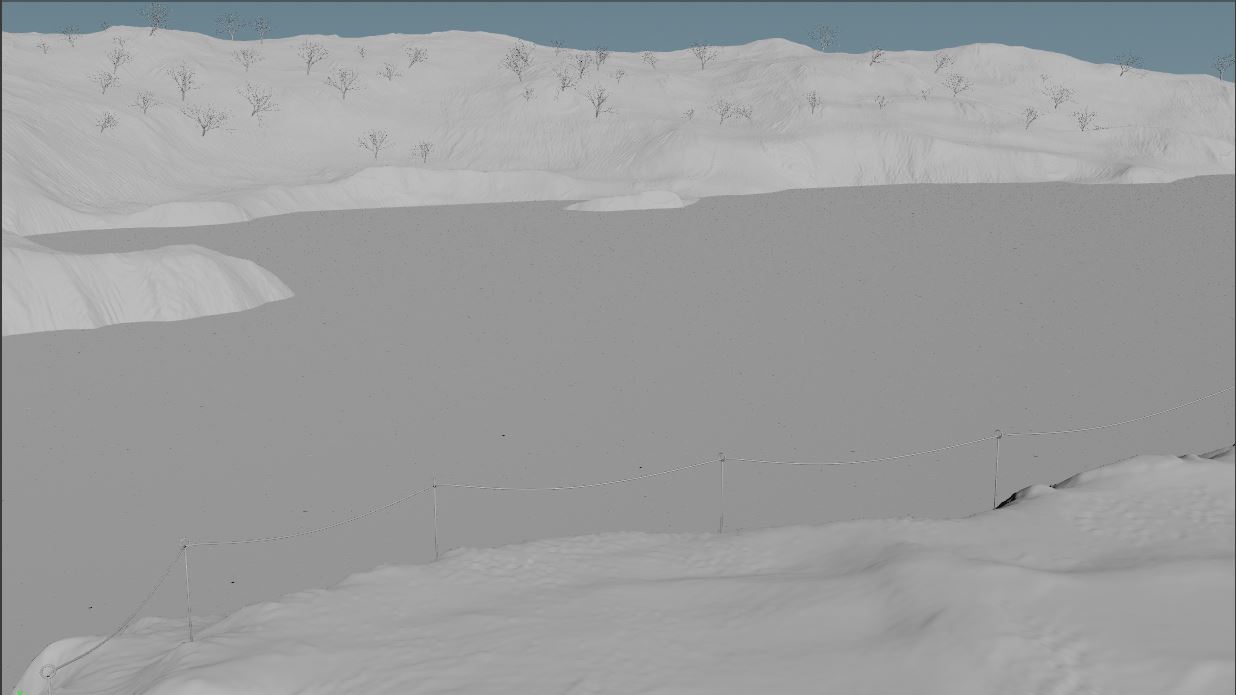
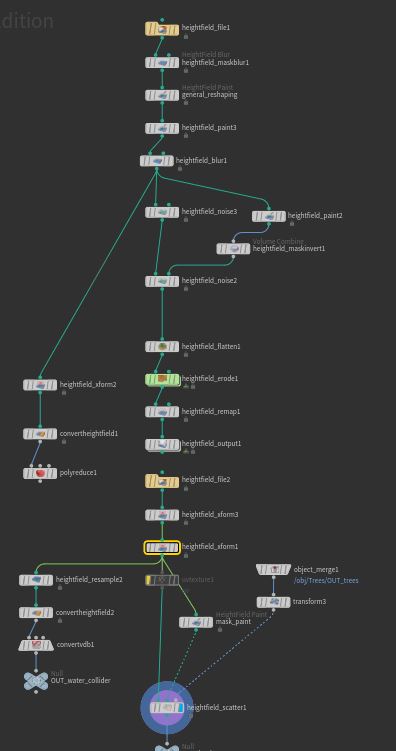
Terrain setup. Due to the heaviness of the height field geometry in the file, an height field output node is used to capture the geological features and then loaded from disk. A fork of the terrain is reduced and converted to volumes for the FLIP Fluid collision detection. Tests will be conducted to see if the volume or polygon soup method works best for the collision.
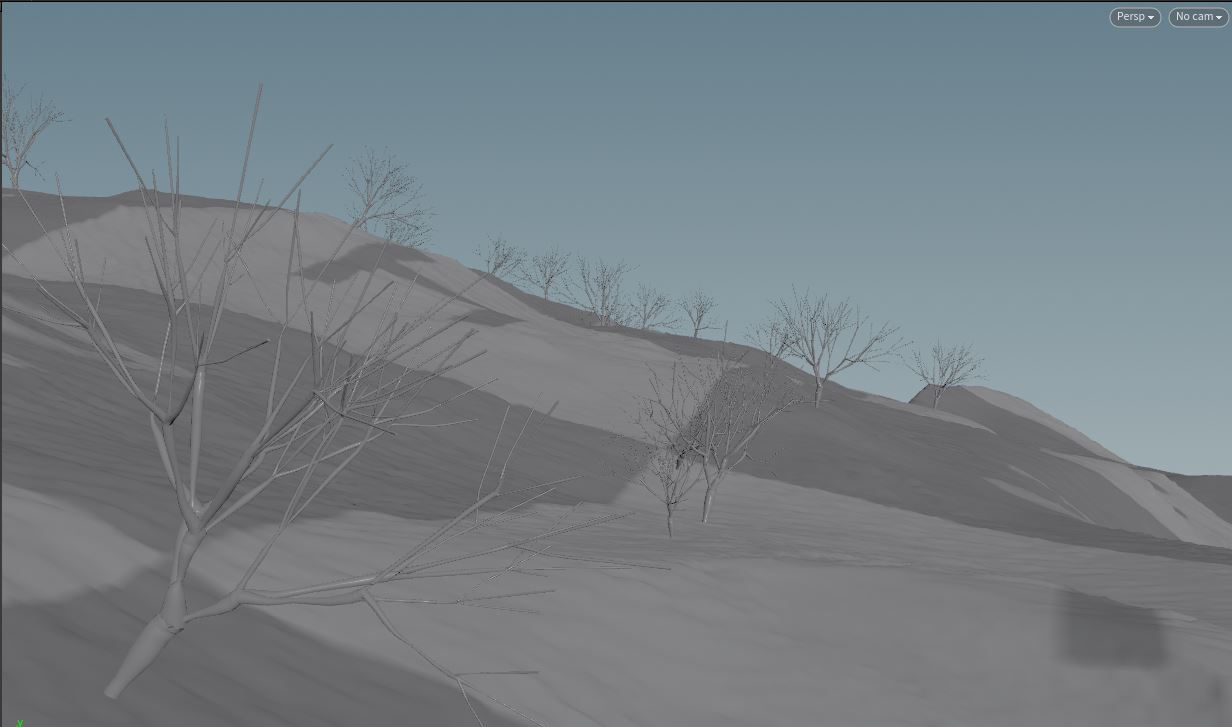
Using the height field scatter nodes, a tree model is distributed on the far island. Currently, the look dev research is heading toward a cold late fall or snowy winter season, which would reduce the complexity of the scene by using bare tree models.
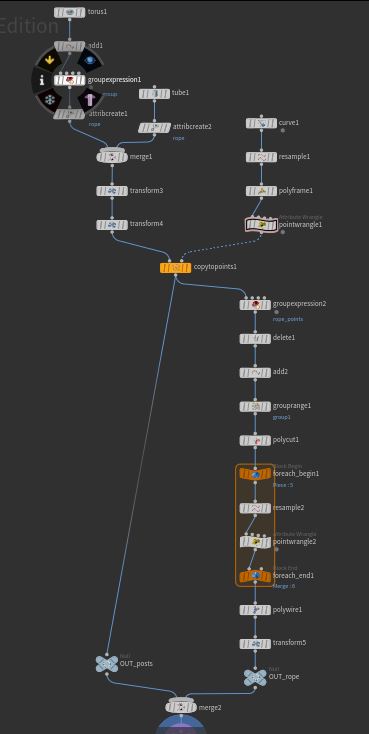
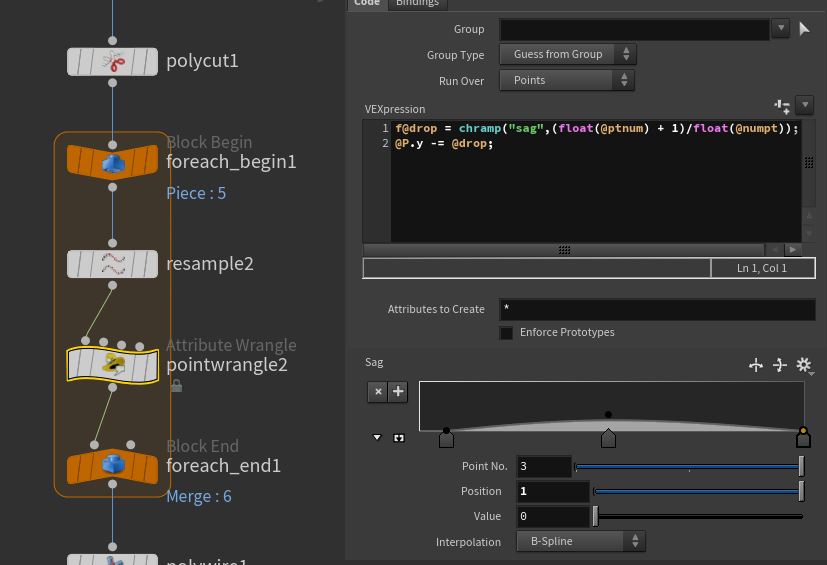
The fence is driven by a drawn curve. The stake geometry is copied to each point, and an add node allows a point with a custom attribute define the position of the rope in the holes. To achieve the droop in the rope fence, a line from the rope points is segmented and then each segment is resampled before having the Y position adjusted through a pop wrangle and a ramp node.
This weekends goals:
- Longer water simulation with whirlpool adjustments made
- Whirlpool size adjustments
- Match water direction better with landscape
- Compress cache of 72-96 frames to use for whitewater development
- Environment texturing started
- Water texturing started
- At least one in-progress still frame with the landscape and water texture
10/3/22 Updates
Quick update this morning. Did a test with the landscape collider, and the wide gap of the river meant a large increase to the simulation tank size. There are issues with the collider that need to be fixed, I will be looking at alternative ways to fill in the river to make it more efficient. Camera angle is in progress as well, right now it does not represent the whirlpools well.
The frame count is really within the run-up time, so the initial moments of the whirlpools forming will not be seen in the final imagery.
Current settings:
Frame Count: 31
Particle Seperation: .03
Particle Radius Scale: 1.2
Grid Scale: 1.75
Particle Count: 126 Million
Sim Time: 9 hours 30 minutes
Meshing Time: 1 hours 29 minutes
10/2/22 Updates
Moving forward with the volume velocity from curve method of creating the maelstrom, I have been testing how different curves might affect the various looks of the maelstroms. The tests are below with their corresponding curve shapes. Very short simulation times are used to keep the iteration process manageable.
Current Settings:
Particle Separation: 0.03
Particle radius scale: 1.2
Grid spacing: 1.75
Particle Count: 11 Million
Sim Time (including particle and surface cache): ~ 1 hour per iteration
In addition to the curve force investigations, progress has been made with the terrain sculpting for the project. The approach taken for the landscape was to use a height map generated from tangrams.github.io as a base for the effects. The height map generated is from topology data of the Saltstraumen data, and then refined through sculpting, noise, and blurs in Houdini. Tangrams heigh map provided a real world starting point for the terrain but the resolution limitations of the data lacked details, so those elements were suplemented manually.

Generated Height Map
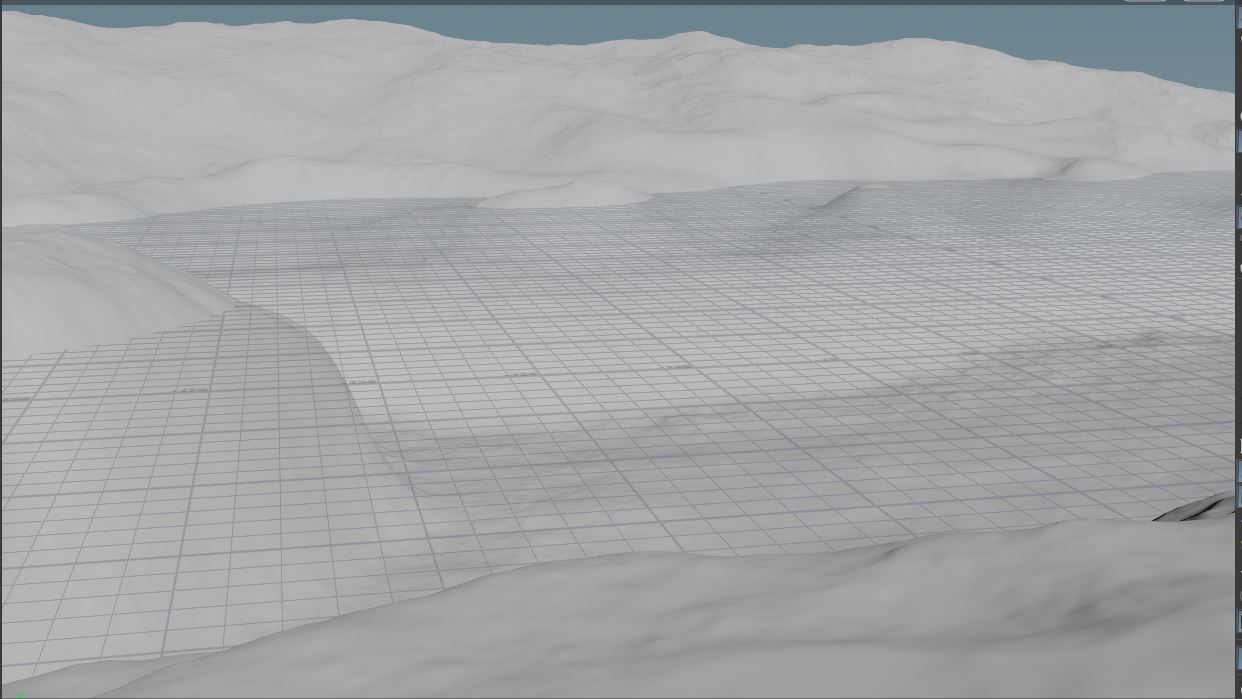
Sculpted Landscape. Grid line represents water level.
9/28/22
Thank you to Mitch Harper and Jie Chen! Based on their feedback, I am exploring a velocity field technique using curves. This is similar to some of the curve force methods I attempted with initial R&D, but using a volume velocity from curve node instead of the FLIP networks curve force node.
I believe the results from my proof of concept will allow me to capture the look needed for the FX, and it is much faster to calculate than the vortex force node setup. Below are two simulations at a decent level of detail for testing. Both tests were simulated within 24 hours, the fastest turnaround time I have been achieved. This is an exhilarating step in the right direction for the project.
Another time-saving effort with worked through since the last update was converting my full particle depth simulation to a narrow band solution. Comparison tests were conducted on low-detail simulations to ensure this method would be as close to the full particle depth equivalent. The tests appear to work well despite the data in the deeper parts of the simulation. If nothing else, this will be the preferred method to work for testing and likely the final simulation.
Note: Both simulations use the same setup but have different tank sizes. This was done to gage how much time was required for a test version versus a close to final size simulation.
9/25/22 Updates
I am working with the vortex force nodes in Houdini for this iteration. The settings are still being adjusted. In this version a larger radius range was provided to see if the results would be more dramatic on the whirlpool walls. Unfortunately, the resulting simulation is not believable. The simulation time is rather slow for the vortex force node calculation based on the performance monitor testing.
White water exploration continues, and I am starting to experiment with textures for the water. I put an ocean shader on the simulation to see what effects are possible with that default shader, and the effect looks promising. The diffuse ramp attributes might be able to produce the effect of tiny subsurface bubbles refracting light differently. This is evident in the lighter bands of water around the whirlpools
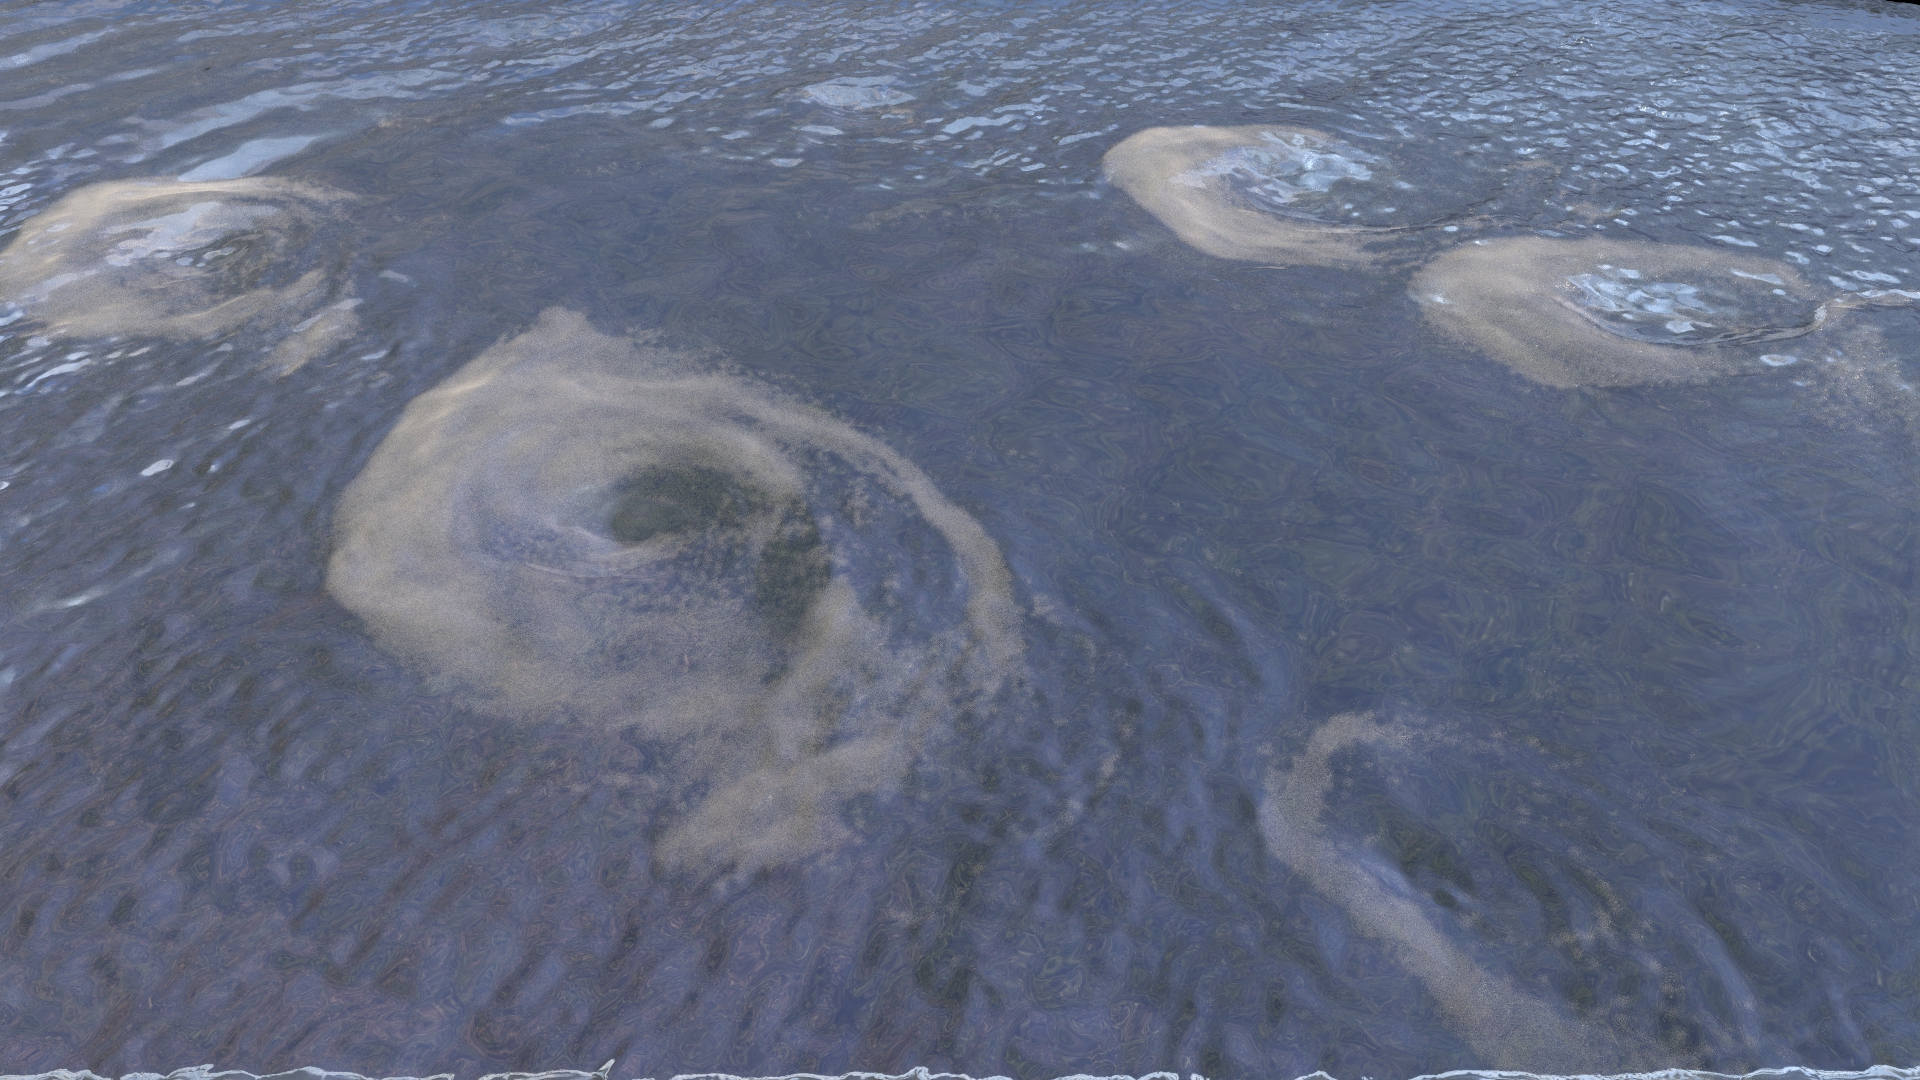
Basic fluid shader
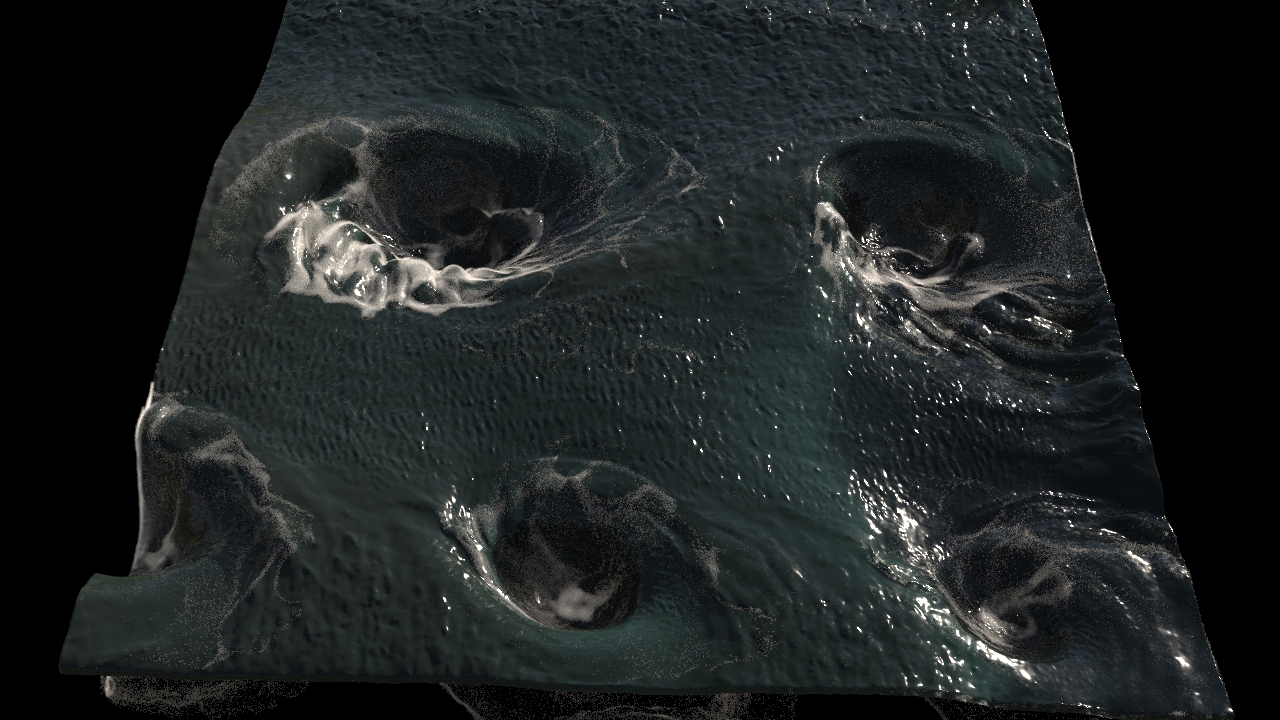
Ocean Shader
9/18/22 Updates
A question was raised on how much detail was possible with the vortex force node method of simulation. To answer this and verify that my current setup is capable of producing high detail results, I created a high detail simulation of a version small slice of the river. The particle seperation for this simulation was 0.025, and the simulation ran overnight and into the next day (approximately 24-36 hours). Simulation times are a great concern at this point in the project. I am looking into different methods that can produce high quality effects quicker.
In addition to these issues, the lower particle simulation introduced fluid compression due to the particle radius scale not being adjust proportionally. This will be addressed in subsequent tests.
9/14/22 Update
Discussions around camera angle and adding in some landmass prompted this update. I am exploring some camera angles with proxy geometry for the land masses based on some reference photography/videography. In addition to testing the angles, the land needs to be added as a collider for the FLIP Fluid, which I started to implement here.
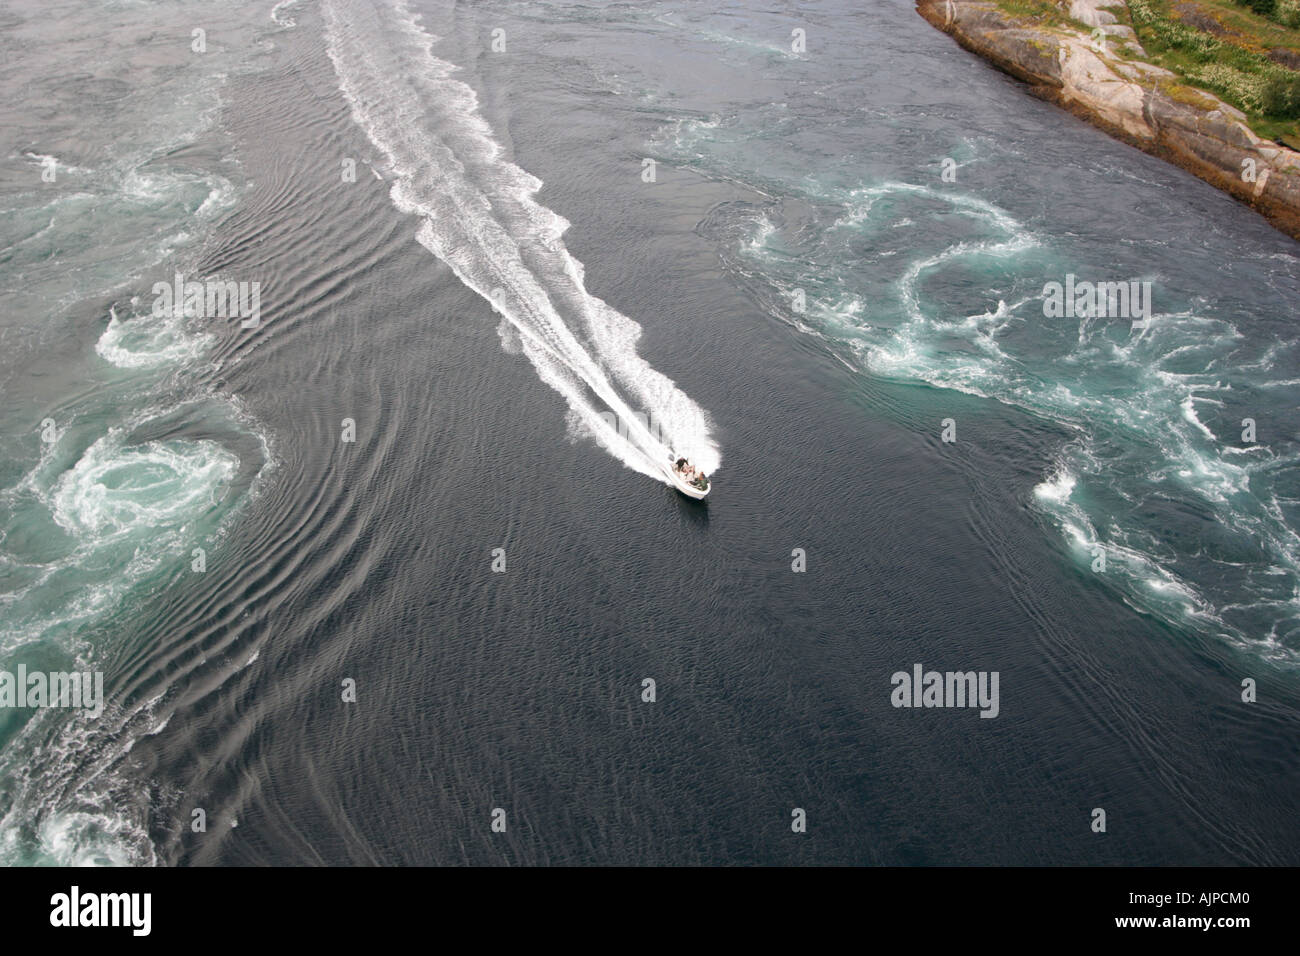
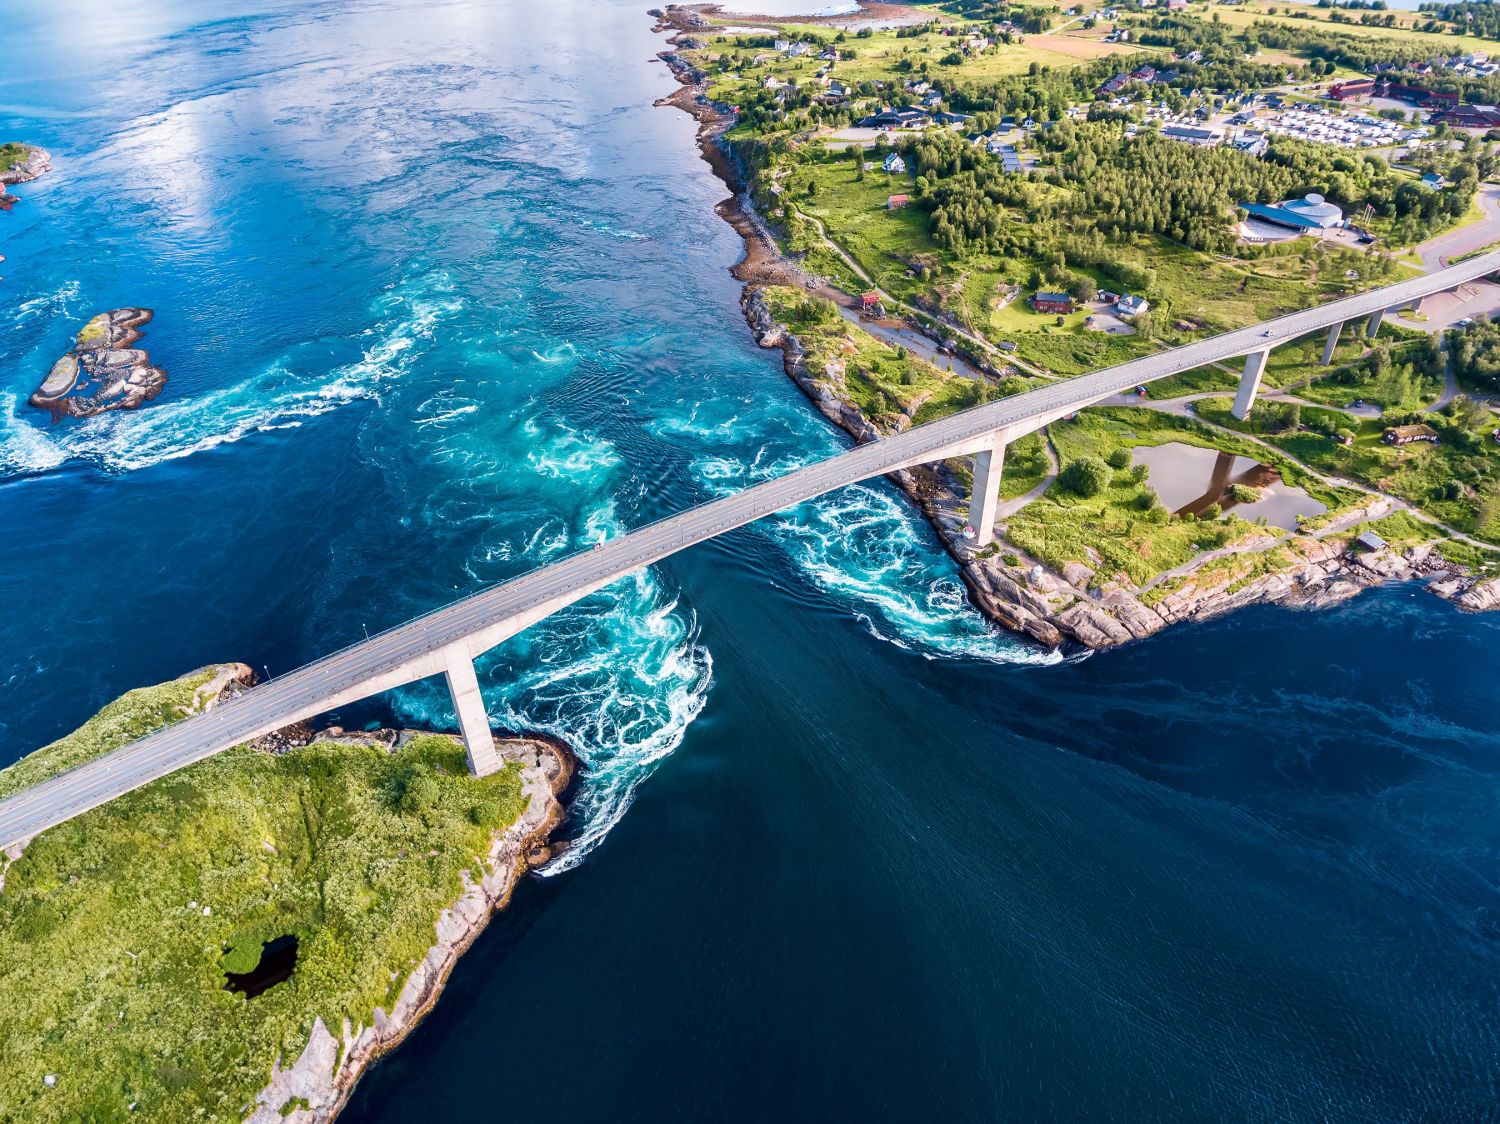
References:
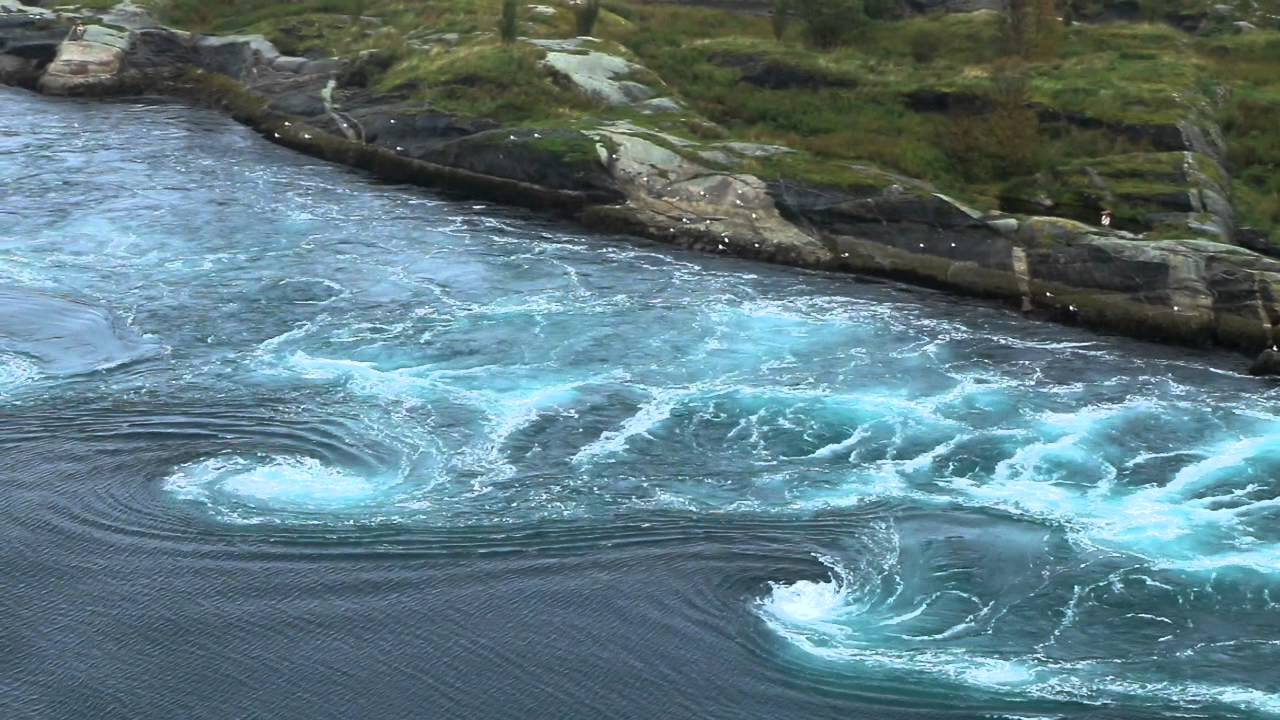
Concept
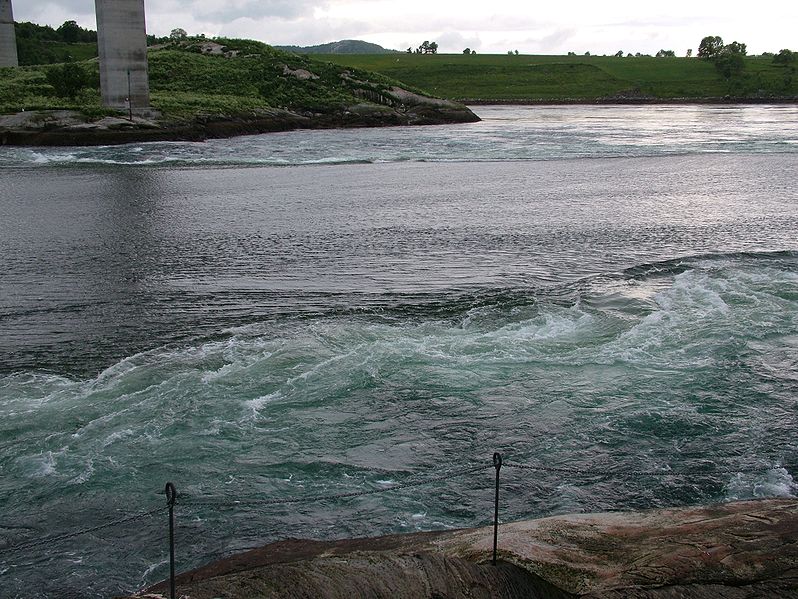
The Saltstaumen maelstrom is a series of current-driven whirlpools in Norway. The strait between the Saltstraumen Fjord and the ocean creates some of the stronger whirlpools in the world. This natural phenomenon is the inspiration for my project. Utilizing Houdini FLIP Fluid, I will be recreating the Saltstraumen maelstrom as accurately as possible. The end goal for the project is to have a visually striking water simulation and breakdown video of the whirlpool and a Houdini setup that is stable, controllable, and art directable. Below are a select few reference images that show the Saltstraumen maelstrom.

Initial R&D
The initial research and development into methods of creating the whirlpool included curve force nodes in the FLIP Fluids, volume fields paired with advection fields, and using moutain nodes with VEX scripting to create vortex fields from point cross products.
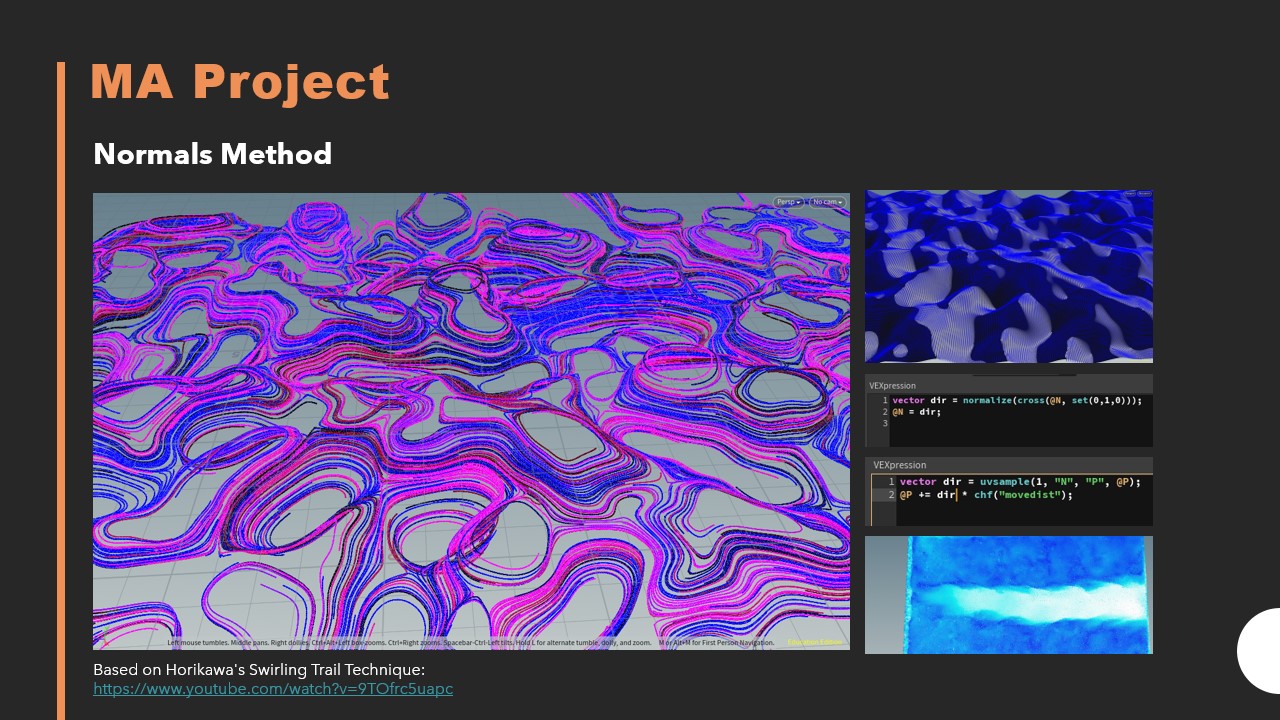
This normals method of creating the velocity field for the project looked promising initially. The swirling motion shown with the volume trail testing is interesting and could create the complex shapes of the vortex if they can be controlled more. However, the method show here uses a mountain node with cross product code driving the swirling motion. In the end the results lack robust control, do not accurately capture the structure of the maelstrom reference material, and failed to created the desired motion in the FLIP Fluid simulation.
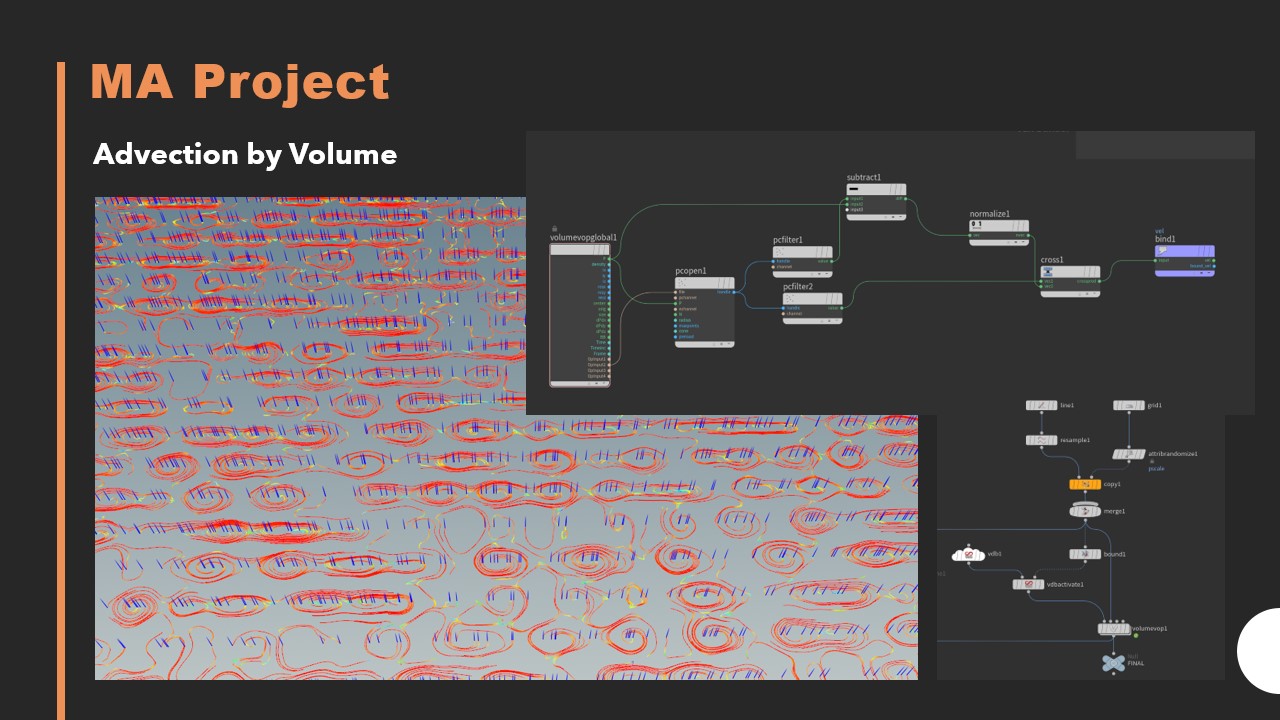
Advection by volume was a failed attempt at moving the FLIP Fluid. The eddies created with the cross product of the lines (shown left) looked promising though at the wrong scale for the simulation. Overall, the method hardly affect the waters motion.
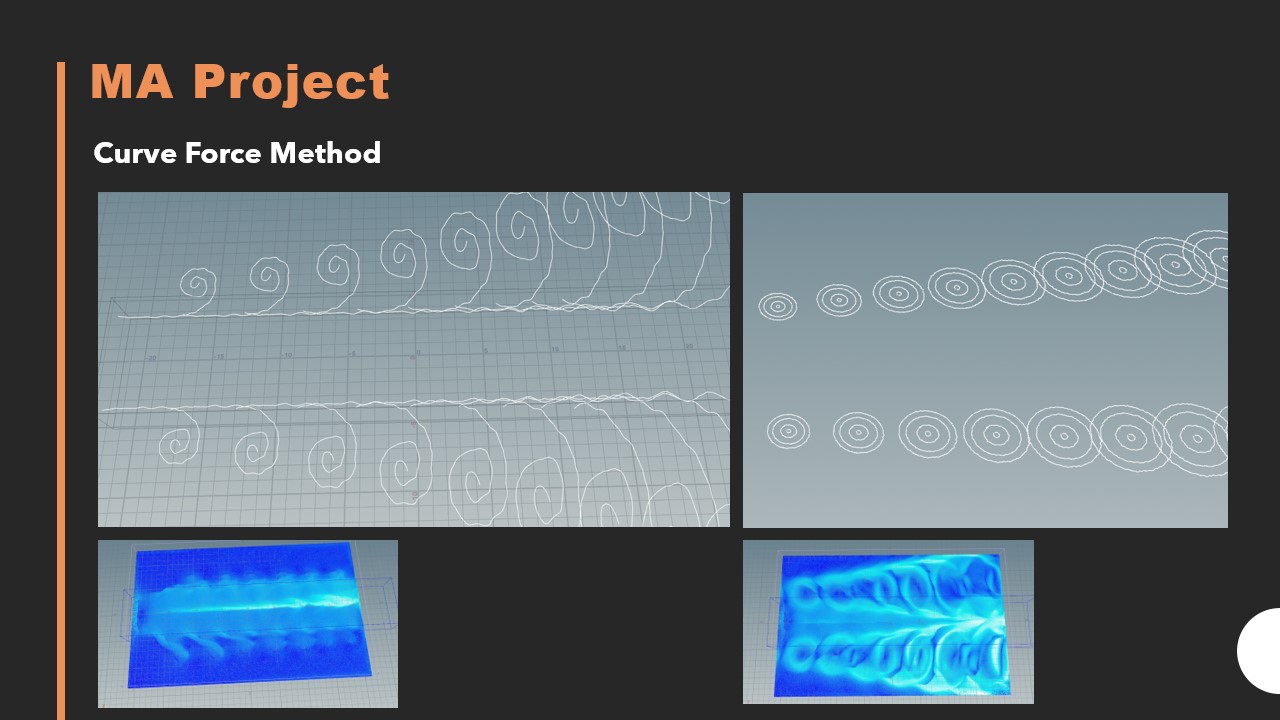
A curve force node with various shapes help to drive the water somewhat like the source material. In addition, the curve force is easy to control. However, the effects are not natural and lack the vortex motion I am looking for in the whirlpools.
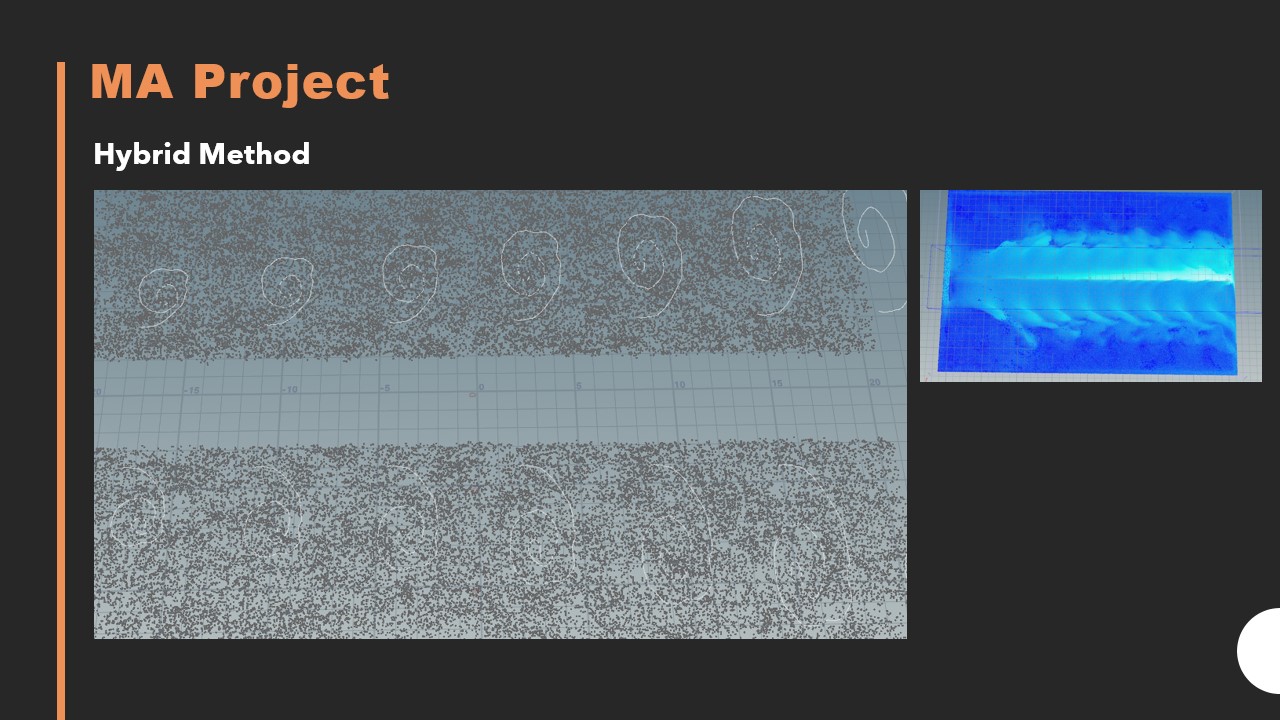
The curve force method lacked some of the randomization seen in the reference material. To try and address this, a hybrid method was attempted where the curve force and noise methods were combined. The results do not look natural enough for the effects.
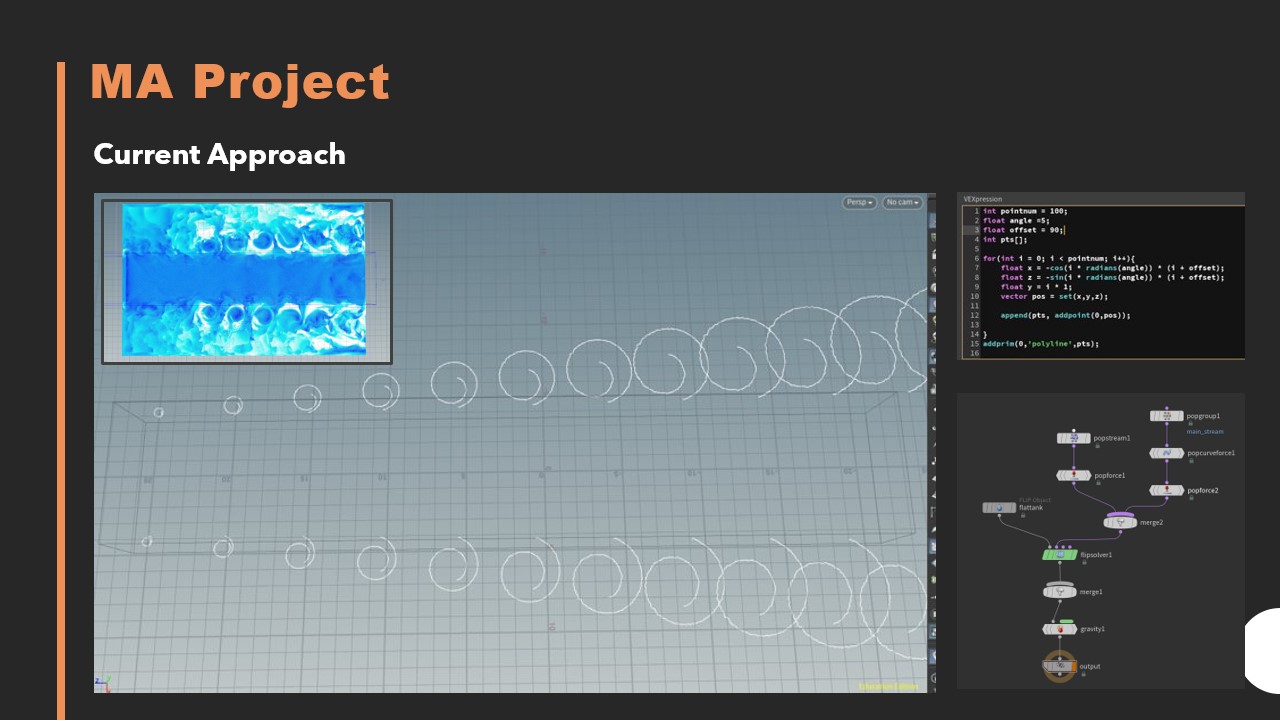
This method uses a curve force node with spiral curves to direct the motion. The spirals are copy and transformed using procedural methods in Houdini to create the multiple velocity forces.

